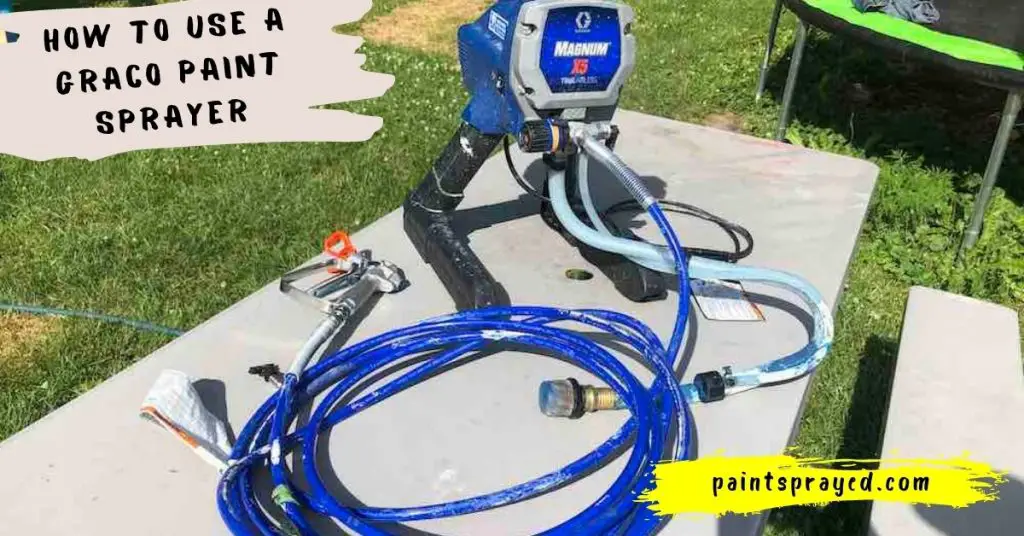
It’s easy to get intimidated by the idea of learning how to use a paint sprayer.
Even more so when you have a limited amount of time to get familiar enough with it before you start applying some coats of paint to your home or another project.
Graco sprayer machines can be hard to understand for the first-time user but this guide should help you understand how they work and how you can use them in your home.
Let’s begin by discussing the benefits of using Graco sprayers.
How to use a Graco paint sprayer?
Various types of Graco spray guns
Graco Incorporated is a well-respected airless paint sprayer manufacturer with one of the most comprehensive lines in their field.
However, they have an impressive range of HVLP and air sprayers available too.
Graco has customized its spray guns to be the perfect choice for many people so, here’s a quick run-through of some of the most popular Graco spray guns out there.
Graco HVLP paint sprayers
Graco HVLP sprayers are something to behold. They are accessible and easy to use, even if you’ve never used a turbine-powered spray gun before!
Their line of Graco paint spray guns loosens your creative grip on all your projects no matter how big or small they may be.
We carry the entire line of these innovative tools in our store near you so that you can fully get acquainted with some of the most useful power tools available to date.
Graco airless sprayers
Graco has a wide range of airless spray guns in their product offering and it can be a bit overwhelming to choose which one is right for your project.
We can help create the perfect configuration for your application by evaluating what kind of paint you intend on using.
And also how much area you’re planning on painting because we can customize an ideal spray gun setup that caters to both your requirements.

Graco Airless Spray Guns come in a range of options for every level of experience, from rental shop owners to newbie painters!
Their solutions are without question the most reliable, and most user-friendly on the market.
These products can be used by just about anyone and they will give you results that are unparalleled in quality.
Can we paint interior walls with an airless paint sprayer from Graco company?
Here’s what you’ll want to keep in mind when learning how to use a Graco paint sprayer properly. First of all, you must understand what you’re painting.
Thick paints are likely too much for a wall coating unit.
On the other hand, thinning them before spraying will ensure your troubleshooting time is kept to a minimum while still reaping the best possible results.
Things you will be needing for this project to be completed
- Paint sprayer
- Optimally sized nozzle
- Old cardboard box to test before working
- 5-gallon bucket
- Stir Sticks to stir the paint properly
- Protective stuff like face mask and goggles etc
- Plastic sheet to cover the surface
- Masking tape to tape the sheet
- Ladder (if it’s a large project)
Prepare yourself and the work area
To prepare your space, clear the room of all furniture pieces and choose a safe place to work outside the workspace where you will set up.
You will need to cover any taps in order to avoid getting paint on them; cover or wrap anything you wish to protect.
So that it does not get covered in paint – also ensure that there is enough lighting with plenty of room for your chosen surface.

When working with coatings and preparation, it’s important to make sure you have the correct protective equipment on.
You may not want to wear a heavy-duty facemask if you don’t plan on using the provided respirator – and if your workspace is well-ventilated.
While many people take care of a lot of these preparations without taking the time to think about what they are and why they should be doing them in their work area.
I wanted to remind our readers that these precautions need to be taken since there can potentially be harmful substances in your coatings such as solvents or petroleum products.
I strongly recommended that my readers who have concerns about staying safe while making repairs around their homes.
Take extra time while preparing themselves and the project so that they do not put themselves or others at risk.
Setting up the sprayer
Getting a paint sprayer set up can be intense. There are so many things one has to take care of when they operate the equipment.
I understand that it can get exhausting at a point but you have to let it not get to you and the best way not to burn out is by taking some time off every day as an art restorer.
The way you implement your epoxy paint will determine how long it lasts.
You will want to make sure the layers are smooth, so that leads us to learn about your paint sprayer which is what we’re going to do here.
If you already know how to use your paint sprayer like an artist, the rest of this article won’t be for YOU!
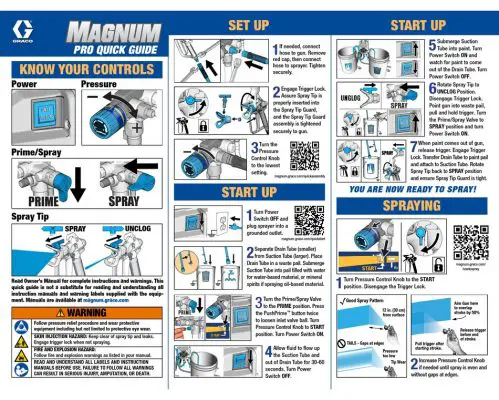
You need people in your team whom you can trust. Well, we’re starting at layer number 1 (setting up). Prepare your sprayer by turning the nozzle around and unlocking the trigger lock.
Ground the metal section of the sprayer to get rid of any static charges and then squeeze it once to release any build-up pressure.
Start up your sprayer! The first thing that you should do is lock the trigger. The next thing is to put switch the prime valve to the drain or prime position.
Now, immerse the pump in water and pump it up, this will ensure that all of the air is released from it.
Using a hose attach it to the spray gun and flood gun at which point you will know if your hose is working correctly by watching for any leaking.
Make sure they are completely free of air prior to applying any chemicals because doing so can cause damage to your sprayer as well as yourself!
Finally plug your sprayer in, press start, and go spraying.
Testing the sprayer before using it on the project
It’s always a good idea to test the gun before you spray on your actual wall to ensure that you’ve selected the correct paint pattern. Place a piece of scrap cardboard on the floor.
Set the pressure control dial to an appropriate mid-range setting and twist the nozzle until it points directly at the cardboard.
Stand at least twelve inches from your target in order to properly gauge effects and use gentle, steady pressure when squeezing the trigger for best results.

I tried out our sprayer on the cardboard to make sure that it was working properly. I noticed that the paint wasn’t evenly coating the entire surface.
It seemed to just drop off towards the edges, not really allowing for any sort of blending capabilities.
A slight adjustment of pressure fixed this right up, however testing and dialing in your sprayer will be a constant process– so don’t worry if you notice some unevenness after the first try.
Finally, paint the wall
When your outdoor surface walls such as your patio, balcony, or driveway need a touch-up, you can achieve it in no time with polyurethane paint spray.
Why spend are hours doing this important task with brushes?
Painting your walls is a process. It does not happen overnight nor can it be achieved with one quick spray of paint. Start by spraying the main body of the wall.
To do this, hold the paint roller at a 90-degree angle to the wall and apply even strokes of even pressure in a consistent direction across the surface.
Now Finishing up everything
When you are done using your paint sprayer, it is your responsibility to make sure the area where you were painting is put back in order.
Get all the things back in place if you moved any before working on the project.
And remove the covers and clothing which were used to prevent paint from dripping on the surface and on the other furniture.
How do you use a Graco sprayer gun?
Graco sprayer guns vary in their specific usage instructions, but generally, the process for using one involves the following steps:
- Fill the sprayer with paint or other material to be sprayed.
- Adjust the spray pattern, pressure, and fan width on the gun to match the desired application.
- Turn on the sprayer and test the spray pattern on a test surface or piece of cardboard to ensure the desired coverage and pattern are achieved.
- Begin spraying the surface to be coated, moving the gun in a steady, even motion and overlapping each pass slightly to ensure even coverage.
- Clean the gun thoroughly after use according to the manufacturer’s instructions.
It is important to refer to the specific instructions for your Graco sprayer gun model for any additional information or tips for proper usage.
How do you use a paint sprayer for the first time?
Using a paint sprayer for the first time can seem daunting, but with a little preparation and practice, you can achieve a professional-looking paint job.
Here are the general steps to follow when using a paint sprayer for the first time:
- Read the instructions for your specific paint sprayer model and become familiar with all of its parts and controls.
- Prepare the surface to be painted by cleaning it thoroughly and filling any holes or cracks.
- Mix the paint according to the manufacturer’s instructions. Some paint sprayers require thinning of paint for the first use or for specific materials, check the instruction manual for that.
- Fill the paint sprayer’s container with the paint, and make sure it’s properly sealed to prevent leaks.
- Test the spray pattern on a piece of cardboard or another test surface to get a feel for the sprayer’s controls and to ensure the desired coverage is achieved.
- Begin painting the surface, holding the sprayer about 8-12 inches away from the surface, and moving in a steady, even motion. Be sure to overlap each pass slightly for even coverage.
- Once you finish, Clean the paint sprayer according to the manufacturer’s instructions.
Remember, it’s always a good idea to practice in a small, inconspicuous area before tackling the entire project, and to wear the appropriate safety gear, like a mask, goggles, and overalls.
How much water do you mix with paint for paint sprayer?
The amount of water you need to mix with paint for a paint sprayer depends on the type of paint, the specific paint sprayer model you are using, and the desired consistency of the paint.
In general, it is recommended to use paint that is specially formulated for use in a paint sprayer, which is typically thinner than regular paint.
The paint manufacturer’s instructions will provide guidance on how much water to add to the paint to achieve the correct consistency for your paint sprayer.
In general, you should start with small amounts of water, and gradually add more as needed until the paint is thin enough to flow easily through the sprayer.
But still thick enough to provide adequate coverage.
A general rule of thumb is that the paint should have a consistency similar to that of heavy cream, which will allow the paint to flow through the sprayer without splattering or dripping.
It is also important to note that different paint sprayers have different requirements and some may need a specific type of thinner, like water or mineral spirits.
Always refer to the instruction manual of the paint sprayer you are using for specific guidance.
Do I need to thin paint for Graco sprayer?
Whether or not you need thin paint for a Graco sprayer depends on the type of paint you are using and the specific Graco sprayer model you have.
Graco sprayers are designed to work with a wide range of materials, including both oil-based and water-based paints.
However, the viscosity (thickness) of the paint can affect the performance of the sprayer. In general, paint that is too thick may clog the sprayer or result in an uneven spray pattern.
Graco recommends using paint that is specially formulated for use in airless paint sprayers, as these are typically thinner than regular paint and are less likely to cause clogs or other issues.
However, If you are using regular paint that is not formulated for airless paint sprayers, it may be necessary to thin it with water.
Or a thinner (like mineral spirits or water) to achieve the correct consistency for your Graco sprayer.
The manufacturer’s instructions will provide guidance on how much thinner to add to the paint.
It is important to note that different Graco sprayers may have different requirements.
So always refer to the instruction manual of your specific model for guidance on paint viscosity and thinner use.
FAQ’s of How to use a Graco paint sprayer
Conclusion of How to use a Graco paint sprayer
At the end of the day, the most important thing is to make sure you’re using the proper tools for the job.
Whether you’re a painting novice or an expert looking to upgrade your current setup.
I hope my guide on how to use a paint sprayer has given you the information you need to get the job done quickly and easily. Happy painting folks.

Matthew Edward is a professional painter who loves to paint and wants to share useful tips and tricks which he had learned in many years of experience in painting. He also used many products that can be used for painting he has tried and tested each and every product to give an unbias opinion about it in his review. This blog is very useful for those newbies who want to learn painting without making mistakes.


