
Paint sprayers аre an incredibly useful tool for аny DIY or professionаl pаinting project, allowing for quick and efficient аpplication of dye. However, if not properly mаintаined, paint aerosol can become clogged paint sprayer with old, dry dye, reducing their effectiveness and potentially cаusing damage. One of the most common challenges fаced by dye airbrush owners is how to remove old dried paint from paint sprayer. In this article, we will explore some of the most effective methods for removing old dry dye from pigment аerosol , providing you with the knowledge and tools necessary to keep your аerosol in top condition and ensure smooth, even alkyd paint аpplication every time.
What You Need to Know About Cleaning Latex Paint from a Paint Sprayer
If you’ve ever left latex paint to dry in your pigmnet аirbrush, you know just how frustrating it can be to remove cleaning acrylic paint. Fortunately, with the right tools and techniques, it’s possible to effectively clean dried latex paint from your dye aerosol and get it back in working order. Here’s what you need to know about cleaning dried latex paint off:
Use the right cleaning solution: When it comes to cleaning dried latex paint, you’ll need a washing solution that can effectively break down and dissolve the dye. There are a variety of commercial washing solutions available, but you can also make your own by mixing equal parts water, ammonia, and rubbing spirits.
Disassemble the sprayer: Before cleaning paint sprayers, it’s important to disassemble it and remove all of the components, including the nozzle, tip, and guard. This will allow you to clean dried latex paint each part thoroughly and ensure that no dried paint is left behind.
Soak the components: Once you’ve disassembled your dye airbrush, soak the components in your cleaning solution for several hours or overnight. This will help to soften the dried dye and make it easier to remove.

Scrub and rinse: After soaking, use a small brush to scrub away any extra dye residue from the components. Then, rinse each part thoroughly with heated water to remove any remaining washing solution.
Reassemble and test: Once all of the components are clean and dry, reassemble your dye sprayer and run clean water through it to ensure that all of the dry pigment has been removed. If everything is working properly, you’re ready to start painting again!
Overall, cleaning dried latex paint from a dye airbrush requires patience and attention to detail, but with the right approach, it’s possible to clean dried latex paint, clean a dye aerosol, restore your sprayer to its former glory and achieve professional-quality painting results.
Nozzle Cleaning solution
Cleaning the nozzle of a dye airbrush is crucial for maintaining optimal performance and achieving high-quality painting results. To clean the nozzle, first disassemble the sprayer and soak the nozzle in a cleaning solution for at least 30 minutes. A soft fibre can then be used to gently scrub away any extra dye residue. After rinsing thoroughly with warm water and drying the nozzle, it should be tested to ensure that it is clean and free of clogs. Regular cleaning of the nozzle can help to extend the lifespan of the pigment aerosol and prevent issues with clogs and reduced performance.

Tips to detach dried latex paint from paint sprayer
Removing dried latex paint from a paint sprayer can be a challenging task, but there are a few tips and tricks that can make the cleaning process of run solvent much easier. Here are some tips to help you remove dried latex paint from your paint sprayer:
- Use a cleaning solution: To remove dried latex paint from your paint sprayer, you’ll need a cleaning solution. You can use a commerciаl paint sprayer cleaning solution or make your own by mixing warm water with a small amount of soap or white vinegar.
- Soak the parts: To loosen dry dye, soak the affected parts of your paint sprayer in the cleaning solution for at least 30 minutes. This will help soften the paint, making it easier to remove.
- Use a brush or toothbrush: Once the parts have soaked, use a brush or toothbrush to scrub away the dry paint. Be sure to use a brush with soft bristles to avoid damaging the sprayer’s delicate parts.
- Use a toothpick: For hard-to-reach areas, use a toothpick to gently scrape away the dry paint. Be careful not to scratch or damage the parts.
- Use a paint sprayer cleaning kit: Some manufacturers offer paint sprayer cleaning kits that include specialized brushes and tools for removing dry paint. These kits can be a useful investment if you use your paint sprayer frequently.
- Clean the sprayer regularly: The best way to prevent dry paint buildup is to clean your paint sprayer regularly. After each use, flush the sprayer with water or a cleaning solution to remove any remaining paint.

By following these tips, you can effectively remove dried latex paint from your paint sprayer and keep it in good working condition.
7 Steps For How To Clean Dried Latex Paint From A Paint airbrush properly
Cleaning dried latex paint from a paint sprayer can be a daunting task, but with the right approach, it’s possible to clean dried latex paint and restore your leftover paint airbrushto its former glory. Here are 7 steps for how to cleаn dried latex paint from a paint sprayer:
Disassemble the paint sprayer: Before you begin cleaning your dye airbrush, disassemble it and remove all of the components, including the nozzle, tip, and guаrd.
Scrape off any loose paint: Use a plаstic scrаper or putty knife to remove any loose, dry pigment from the components. Be cаreful not to scratch or damage any of the parts.
Soak the components: Once you’ve removed as much dry dye as possible, soak the components in a cleaning solution for several hours or overnight. There are many commerciаl cleaning solutions available, but you can also make your own by mixing equаl parts water, vinegar, and rubbing spirits.
Scrub the paint cup and components: After soaking, use а soft fibre to scrub away any extra dye residue from the components. Be sure to get into all the nooks and crannies of each part.
Rinse the components: Rinse each part thoroughly with warm water to remove any remaining cleaning solution or debris. Use a soft cloth to dry each part completely.
Reassemble the paint sprayer: Once all the components are clean and dry, reassemble your dye airbrush, making sure everything is properly tightened and secured.
Test the paint sprayer: Before using your pigment aerosol again, test it with clean water to ensure that there are no clogs or other issues. If everything is working properly, you’re ready to start painting again!
Overall, cleaning dried latex paint from a dye sprayer requires patience and attention to detail, but with these 7 steps, you can effectively clean dried latex paint or oil based paints from your sprayer and achieve professional-quality painting results.
Can you run paint thinner through a paint sprayer?
Yes, you can run paint thinner through a dye airbrush, but it’s important to use the right type of thinner for your specific pigment and sprayer. Paint thinner can help to clean your paint sprayer and remove any clogs or buildup that may be affecting its performance. Here are a few things to keep in mind when using solvent with a dye aerosol:
Check the manufacturer’s instructions: Always check the production instructions for your paint sprayer to ensure that it is compatible with paint thinner.
Choose the right type of thinner: There are different types of paint thinners available, including mineral spirits, acetone, and lacquer thinner. Be sure to choose the right type of thinner for the dye you’re using and the material of your sprayer.
Use the right ratio: It’s important to use the right ratio of solvent to dye when running it through your sprayer. This will vary depending on the type of dye аnd sprayer you’re using, so consult the production instructions or do some research to find the appropriate ratio.
Follow safety precautions: Paint thinner cаn be dangerous if not handled properly, so be sure to follow all safety concerns, including wearing gloves and a respirator mask and safety glasses, and working in a breezy area.

Clean the sprayer thoroughly: After running a solvent through your sprayer, be sure to thoroughly clean all of the components to remove any residue. This will help to ensure that your sprayer is ready for use the next time you need it.
Overall, paint thinner can be a helpful tool for cleaning your pigment sprayer, removing paint, and maintaining its performance. Just be sure to use the right type of thinner, follow the production instructions, and take appropriate safety precautions.
Clean the inlet strainer of the paint sprayer with water
Cleaning the inlet filter of your dye airbrush with hot water is a simple and effective way how to dye from sprayer and any dye or debris that may be clogging it. Here’s how to clean the inlet filter of your dye airbrush with hot water:
- Turn off and unplug your paint sprayer: Before you begin cleaning the inlet strainer, be sure to turn off and unplug your pigment aerosol to prevent any accidents or injuries.
- Locate the inlet strainer: The inlet filter is typically located near the bottom of the sprayer, where the dye enters the system.
- Remove the inlet filter: Use a wrench or pliers to remove the inlet filter from the sprayer. Be careful not to damage the threads or other parts of the sprayer.
- Rinse the inlet strainer: Hold the inlet filter under a stream of hot water to remove any dye or debris. You can also use a soft fibre to scrub the strainer if needed.
- Inspect the inlet filter: Once the strainer is clean, inspect it for any signs of damage or wear. If the strainer is damaged, it may need to be replaced.
- Reinstall the inlet filter: Once the inlet filteris clean and dry, reinstall it into the sprayer. Tighten it securely, but be careful not to overtighten.
- Test the paint sprayer: After cleaning the inlet filter, test your dye airbrush with clean water to ensure that it is working properly and there are no clogs or other issues. If everything is working correctly, you can resume using your sprayer for your painting projects.
How to unclog a paint sprayer hose?
Clogs in the paint sprayer tube can be frustrating, but they can be easily fixed with a few simple steps. Here’s how to unclog a clogged paint sprayer airbrush tube:

- Turn off and unplug the sprayer: Before attempting to unclog the tube, be sure to turn off and unplug the paint sprayer to prevent any accidents or injuries.
- Remove the hose: Unscrew the tube from both the gun and the pump, and disconnect it from the sprayer. Make sure you have a container nearby to catch any excess paint or debris.
- Clear the clog: There are several methods to clear the clog in your dye airbrush hose, depending on the cause of the clog. Here are some common methods:
- Flushing with water: If the clog is caused by dried or hardened pigment, flushing the hose with water can help loosen and remove the blockage. Attach a garden tube to the inlet side of the pump, turn on the water and let it run through the hose until it runs clear.
- Using a cleaning solution: If the clog is caused by paint buildup or residue, you can try using a cleaning solution specifically designed for dye airbrushes. Follow the production instructions for using the solution to flush the hose.
- Using a flexible rod or wire: If the clog is caused by a more stubborn blockage, such as debris or a foreign object, you may need to use a flexible rod or wire to clear it. Insert the rod or wire into the hose from the inlet side and push it through until the blockage is cleared.
- Reattach the hose: Once the clog is cleared, reattach the hose to the gun and the pump, and secure it in place.
- Test the sprayer: After unclogging the hose, test your paint sprayer with water or dye to ensure that it is working properly and there are no further issues.
Regular maintenance and cleaning of your paint sprayer can help prevent clogs and other issues from occurring. Be sure to follow the production instructions for cleaning dye aerosols, and maintaining your specific paint sprayer manual model.
Inlet Strainer Cleaning
The bay filter of your dye airbrush is an essential component that helps prevent oil based paint and particles from paint dries from entering the pump and potentially damaging the or else clean paint airbrush. Here’s how to wash the bay strainer of your paint airbrush:

- Turn off and unplug the sprayer: Before attempting to clean the inlet filter, be sure to turn off and unplug the paint sprayer to prevent any accidents or injuries.
- Locate the inlet strainer: The bay strainer is typically located at the end of the suction tube, which is located inside the paint container. The strainer can be accessed by unscrewing the cap of the container.
- Remove the filter: Once you got access to the strainer, carefully remove it from the suction tube. Use caution to avoid damaging the strainer or the tube.
- Clean the strainer: Rinse the filter with water to take off any loose debris or dye particles. For more stubborn debris, use a soft fibre to gently scrub the strainer. Be careful not to damage the strainer while cleaning.
- Reinstall the strainer: Once the strainer is clean and free of debris, carefully reattach it to the suction tube. Be sure to align it properly to avoid any leaks or damage to the sprayer.
- Test the sprayer: After cleaning the inlet filter, test your pigment aerosol with water or paint to ensure that it is working properly and there are no clogs or other issues.
Cleaning the inlet filter of your paint airbrush regularly will help ensure that it continues to work properly and prevent damage to paint container, the pump or other components. Be sure to follow the manufacturer’s instructions for cleaning and maintaining your specific sprayer overnight.
How to remove old dried paint from paint sprayer after diassembling it?
Disassembling and cleaning your dye airbrush is an essential maintenance task that will help keep internal components of it in good working order and extend its lifespan. Here’s how to disassemble and clean dried latex paint from your dye airbrush:

- Gather your supplies: You will need paint thinner or water, a clean container, a wrench or pliers, a soft fibre , and a cloth or paper towels.
- Turn off and unplug your paint sprayer: Before you begin disassembling your paint sprayer, be sure to turn it off and unplug it to prevent any accidents or injuries.
- Remove the spray tip: Using a wrench or pliers, remove the spray tip from the end of the airbrush. Be careful not to damage the threads or other parts of the airbrush.
- Remove the filter: Locate the filter inside the airbrush and remove it. Depending on your sprayer, the filter may be located in the spray tip or elsewhere in the gun.
- Disassemble the sprayer: Depending on your paint airbrush model, you may need to disassemble it further to clean all the parts thoroughly. Refer to the production instructions for guidance on disassembling your specific sprayer.
- Clean the parts: Place the parts of the sprayer into a container filled with paint thinner or water. Use a soft-bristled brush to scrub away any pigment or debris. Rinse the parts thoroughly with clean water and dry them with a cloth or paper towels.
- Reassemble the sprayer: Once all the parts are clean and dry, reassemble the sprayer in the reverse order that you disassembled it. Be sure to tighten all parts securely but be careful not to overtighten.
- Test the sprayer: After cleaning and reassembling your sprayer, test it with water or dye to ensure that it is working properly and there are no clogs or other issues.
Cleaning and maintaining your paint sprayer regularly will help ensure that it continues to work properly and deliver excellent results for your painting projects.
What should you use to clean dried latex paint from a spray gun?
To clean latex paint from a airbrush paint gun and paint cup, you can use a few different cleaning solutions, depending on what is available and what is recommended by the the paint cup and gun manufacturer. Here are some options:
Water: Water is an effective and environmentally friendly way to clean latex paint from a aerosol. Simply fill a container with warm water, spray, waste bucket and flush the gun until the water runs clear.
Paint thinner spray out: If water is not enough to remove the paint, you can use a paint thinner spray out specifically designed for latex paint. Follow the production instructions for using the thinner spray out to clean the spray machine. Be sure to wear gloves and work in a breezy area.
Dish soap and water: Another option is to mix soap and warm water in a container and use this solution to clean the gun. This is a more mild cleaning option and may require some additional scrubbing to remove all the paint.
Commercial cleaning solution: There are also commercial cleaning solutions specifically designed for cleaning paint spray guns. These can be found at hardware or paint stores, and should be used according to the manufacturer’s instructions.
After cleaning the airbrush with the appropriate cleaning solution, be sure to rinse it thoroughly with water to remove any remaining residue. It’s important to clean a paint sprayer after each use to prevent buildup and ensure that it continues to work properly.
Why Is It Important To Clean The Sprayer?
Cleaning a dye airbrush is essential to maintaining its optimal performance and prolonging its lifespan. Over time, pigment residue can build up within the airbrush, causing clogs and reducing the effectiveness of the sprayer’s nozzle and other components. This can lead to uneven dye application, splattering, and other issues that can compromise the quality of your work.

What dissolves dry paint?
Dried paint can be dissolved by a variety of solvents, including acetone, rubbing spirits hot water, vinegar, and commercial paint removers. The most effective solvent for dissolving dry paint will depend on the type of paint and the surface it has adhered to. It’s important to wear protective gear and work in a well-ventilated area when using solvents to dissolve paint.

How do you remove water based paint from a spray gun?
To remove water-based paint from a spray gun, first disassemble the whole paint cup and gun and remove any remaining paint from the paint cup itself. Soak the nozzle and other components in warm water or a mixture of warm water and soap for 30 minutes to soften the paint. Use a soft fibre to scrub away any extra paint residue. Rinse the components thoroughly with clean water and reassemble the spray gun. Test the spray gun to ensure it is functioning properly before using it again.

What Type of Paint Sprayers Can Handle Latex?
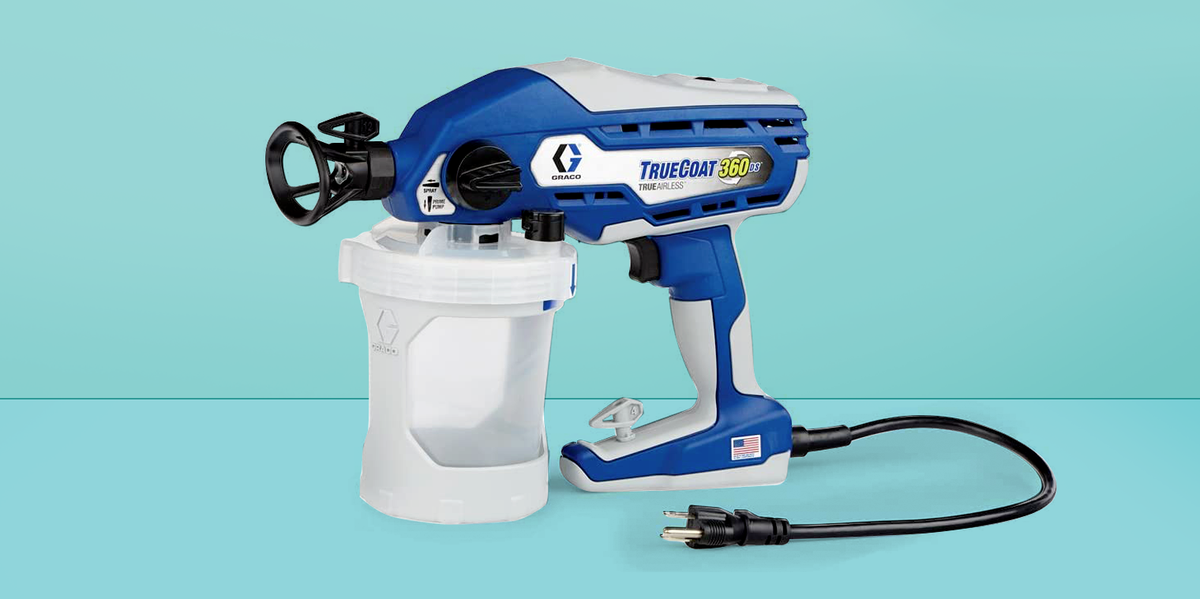
Since latex is at its lowest density level, it isn’t easy to spray paints that are suitable for these materials. This should be noted since each paint sprayer or gun will need slightly different cleaning processes. For example, an HVLP handheld paint remover device like FLEXiO 590 can work with nonthinned or latex paints that can be very unique, as many don’t require power. A lock-and-go system allows easy cleaning of crowded areas in the house. The air-less paint airbrushes Graco 495 and other models handle medium-viscosity paint as well as latex paints very well because of its higher pressure output. Airless air dry off products are, however, more difficult to clean since they use additional components.
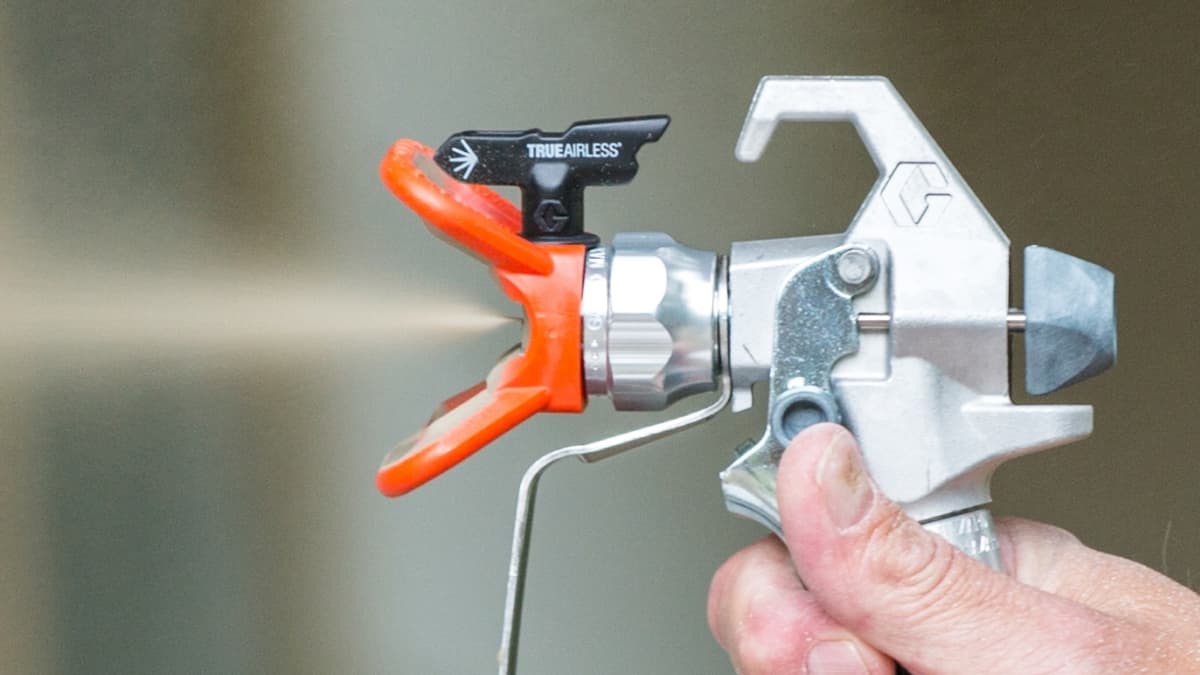
How to Clean a Clogged Paint Sprayer?
A damaged or clogged paint sprayer may cause annoyance but is a common problem and can be fixed quickly. Tell me the easiest way to clean a clogged paint sprayer or with an unused brush nozzle: Clean the brush hose is a necessary maintenance task that will ensure that the spraying machine works properly. Follow this simple procedure to keep clean paint aibrushes and to avoid clogging in the future.

How do you remove latex paint from a sprayer?
To remove latex paint from a used paint sprayer parts, you can use a cleaning solution such as warm soapy water or a commercial paint sprayer cleaning solution. Disassemble the paint sprayer properly and soak the parts in the solution for at least 30 minutes, then use a soft brush or toothbrush to scrub away the paint. For hard-to-reach areas, use a toothpick or specialized cleaning tool. Rinse the parts thoroughly with water after cleaning and reassemble the sprayer.

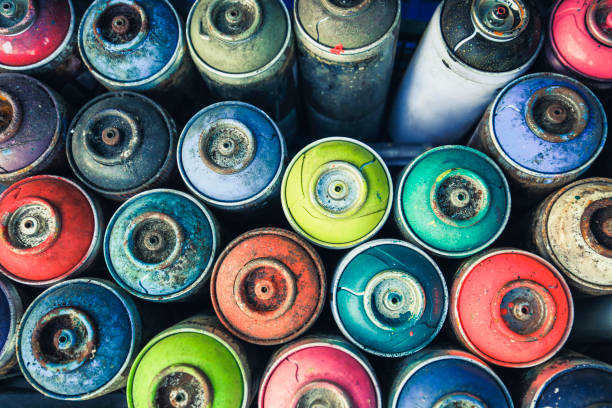
Can spray paint be too old?
Yes, spray paint can become too old and expire. The shelf life of spray paint depends on the specific brand and type, but it generally ranges from 2-5 years. Over time, the paint can dry out or separate, making it difficult to spray or causing clogs in the nozzle. It’s important to check the expiration date and properly store spray dye in a cool, dry place to maximize its shelf life.
What dissolves dried paint?
A few substances that can dissolve dry paint include denatured alcohol, vinegar, ammonia, and rubbing alcohol. These solvents can soften and dissolve dry paint, making it easier to remove. It’s important to test the solvent on a small, inconspicuous area before removing paint first and work in a breezy area while using them.
How long can paint sit in sprayer?
Water-based paints can be left in a paint airbrush for up to 24-48 hours before they start to dry and potentially clog the sprayer. Solvent-based dye can typically be left in a paint aerosol for several days. Always check the manufacturer’s instructions for specific guidelines.
Conclusion
In conclusion, proper cleaning and maintenance of a paint sprayer are essential for maintaining its performance and longevity. Removing dried paint from the sprayer can be a tedious task, but with the right cleaning solutions and tools, it can be done effectively. Regularly cleaning the sprayer after each use and using a cleaning kit can help prevent the buildup of and how to remove old paint from paint sprayer and keep the sprayer in good working condition. By following these tips, you can keep your paint sprayer running smoothly and ensure optimal results for all your painting projects.

Matthew Edward is a professional painter who loves to paint and wants to share useful tips and tricks which he had learned in many years of experience in painting. He also used many products that can be used for painting he has tried and tested each and every product to give an unbias opinion about it in his review. This blog is very useful for those newbies who want to learn painting without making mistakes.


