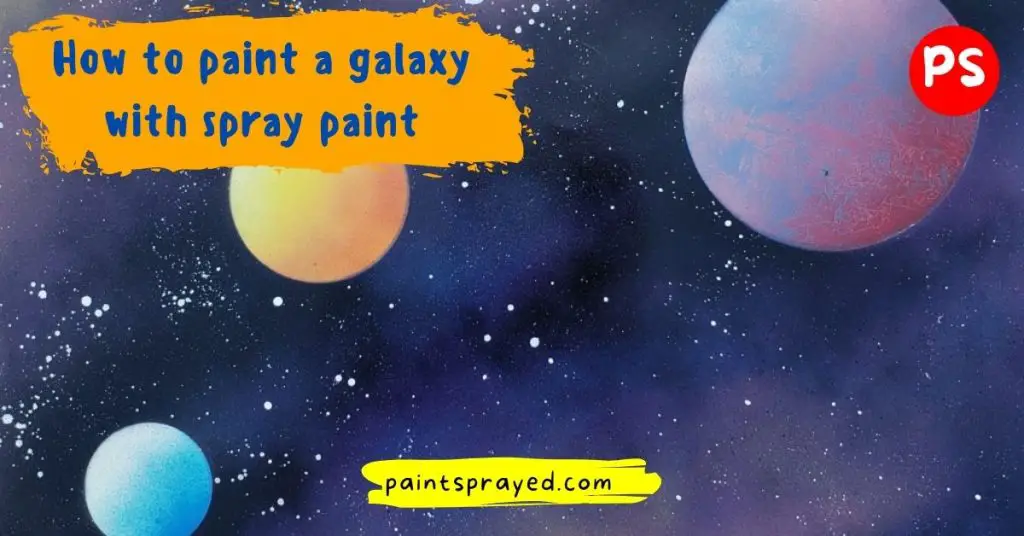
In this guide, I will teach you the method to paint a galaxy for yourself or for your clients with the help of spray paints.
This guide will be a step-by-step guide thus easy to understand and apply on the surface without creating any mess.
Spray-paint art is reminiscent of hip-hop dance, both having roots in the streets and being invented by people who had no formal training.
While you might not think about it, both can really touch your soul – just ask anyone that saw the spray-paint artist painting a floating moon above the silhouette of the Golden Gate Bridge.
How to paint a galaxy with spray paint?
Learn the Language of spray paint
I’m often reminded of how unique a task spray painting is. To the naked eye, it may appear as though we’ve got it down to a science.
But in actuality, we have to let go of some preconceived notions or assumptions that one might have about painting in general.
And really just trust our instincts when we’re out there on the streets spraying nozzles side by-side murals with our comrades.
I personally had to overcome any fears or doubts I once held regarding the task of graffiti artistry before taking my skills and talents out into the streets.
Looking at how you can create art? Here is the complete guide to make spray paint art.
Tools required to do the job
Here is the list of some tools that we will use to spray paint a galaxy. These all tools are required to do the complete job so collect these from paint shops or nearby hardware stores.
- Mask for protection
- Spray paints for the project
- Poster boards also required to do painting
- Use the glossy side for painting
- Use round-shaped objects like cans, lids, and plastics pots, of various sizes
- A raised hollow side
- Magazine cover or small piece of thick paper
- For stencil making use cardboard
- Gloves for protection of hands
Make spiral galaxy
I used an oval stencil to create the galaxy and made sure that I created a dark background on half of the painting.
Then, I added 3 cut-out oval stencils from larger to smaller sizes.
Next, I raised them up about 1″ to 2″ above my surface and painted the center of the galaxy from yellow to pink to white.

Cut out a few nearby star forms on cardboard and use the stencil method to paint them in your favorite colors.
I recommend using the raised stencil technique, rather than the traditional flat one.
As it gives you a lot more control and allows you to avoid ending up with something that looks like this.
Making of planets
It’s important to consider the position of the planets, especially if you plan to paint a big mural.
Before we put any paint down on the wall though, we first spray black paint to mark where we think the planets will be.
We do this because it helps us find a balanced composition with all 12 planets before starting work.
To start with, you need to have an idea of the number of planets you’re going to be drawing.
It will depend on the level of complexity, but we find that three planets or more make for a nice decoration.
Choose whichever colors best reflect your vision for the project and arrange them in the order you feel is best.
Start off with blue because it contrasts most strongly with pink and yellow.
From there, use green for the next layer in order to create some variety before wrapping up by using black as the outermost layer of shading.
You can always go from light to dark if you want something that’s a little less bold.
While the paint is wet, crumple up a bit of old newspaper and press it onto the area where you are painting one of your planets.
Use your fingers to gently mess up the sides of your paper so that they’ve covered in a light layer of paint but not soaked through.
Carefully lift the newsprint from the planet’s surface and voila – a realistic space painting for all to see.
If the color scheme of your painting is not going to be very complicated, you can use the same color scheme for the areas of stars (see bonus tip below) around your other planets.
If not, make sure that in any case, a harmony still exists between all of them. Listening to music while painting could help your decision-making process.
After all, the planets are painted and everything else is covered with paint cans and lids (see bonus step below), we will cover our canvas with a layer of foil.
Make of Void and Aurora
To begin this painting, start applying dark blue hues from the edge of the page toward the center.
Then fill in your background with some metallic violet and bright lime green. After that, use peacock blue to add shading to the islands and the white space near the spirals.
Remember not to get too close to your paper if you are using a single-layer misting method because it will ruin your transitions!
For this painting, I wanted to create a subtle blurring effect making it seem as though there is lots of pretty light coming from all the different angles.
So feel free to improvise by adding some additional lights however you like them.
This is the fun part! You’ll need a piece of thick white paper and some good old-fashioned paint.
Take your piece of paper, lay it flat where you would like the first cluster of stars, hold it firmly in place with one hand and spray liberally with white paint.
You want to make sure there’s enough paint on the paper so that when you take your other hand and begin tapping carefully around each star, they leave dents behind!
Stars and comets are made using the Raised Stencil method! To make a star, poke a hole in a piece of cardboard and lift it up at an angle to spray over the small opening.
If you want to make a comet, turn your aerosol can upside down so the nozzle is facing toward your direction, lightly tap the bottom of the can, and give a quick spray.
Easy! One last tip – it’s easier to get an even coat if you hold your stencil perpendicular to your design rather than holding it at an angle.
How do you spray paint galaxy and planets?
To spray paint a galaxy or planet, you will need the following materials:
- Spray paint in various colors (black, blue, purple, pink, and white are common colors used to create a galaxy effect)
- A surface to paint on (canvas, wood, or paper)
- Masking tape or painter’s tape
- Stencils or templates (optional)
Instructions:
- Prepare your surface by taping off any areas you don’t want to paint.
- Start by spraying the black paint to create the base for the galaxy. This will be the background for the other colors.
- Next, use blue, purple, and pink paint to create the galaxy effect. You can use a stencil or template to create a specific shape, or you can freehand the design.
- Use white paint to create stars and highlights.
- Once the paint is dry, you can remove the masking tape and display your galaxy or planet.
Note: It is important to use spray paint in a well-ventilated area and to follow the manufacturer’s instructions for safe use.
What colors do you mix to make galaxy?
To create the appearance of a galaxy, you would typically mix shades of purple, blue, and pink.
Black and white can also be used to create the appearance of stars and the dark spaces between them.
Other colors such as yellow, green, and red can also be used to create different variations of galaxies.
How do you spray paint a space scene?
Spray painting a space scene can be done by following these steps:
- Prep your surface by cleaning it and masking off any areas you don’t want to be painted.
- Prime your surface with a spray paint primer, this will ensure that your paint adheres well and gives you an even base to work on.
- Choose the colors you want to use for your space scene. Typically, for a galaxy, you will use shades of purple, blue, and pink. Black and white can be used to create the appearance of stars.
- Start with the background color and spray it on the surface, using sweeping motions to create a smooth and even coat.
- Once the background color is dry, use a smaller nozzle on your spray paint can to add details such as stars and nebulae. Use a combination of stencils and freehand spraying to create these details.
- Once you’re happy with the details, you can then add highlights or shadows to give your space scene more depth and dimension.
- Finally, you can add a varnish to protect the surface and ensure that your painting lasts for a long time.
It is important to remember to work in a well-ventilated area and use a respirator when working with spray paint.
How do you paint a galaxy wall step by step?
- Start by preparing your surface by cleaning and priming it, if necessary.
- Next, sketch out the basic shape of the galaxy on your wall using a pencil. This can be a rough sketch and does not need to be perfect.
- Once you have the basic shape, you can start to add in the different colors of the galaxy using acrylic paint. Use shades of blue, purple, and pink to create the swirling clouds of gas and dust that make up the galaxy.
- Use a small brush to create the finer details of the galaxy such as stars, nebulas, and other celestial bodies.
- To add more depth to your painting, you can use a dry brush technique. This is done by taking a dry brush and lightly dragging it over the paint to create a textured effect.
- Finally, you can add highlights and shadows to your painting to give it a more realistic look. You can do this by using a lighter color to add highlights and a darker color to add shadows.
- Once you’re happy with your painting, you can seal it with a clear varnish to protect it.
Note: These are just basic steps, you can add your own creativity and technique to make it look more realistic.
And take inspiration from online tutorials, images, and videos for more detailed instructions.
FAQ’s of How to paint a galaxy with spray paint
Conclusion on How to paint a galaxy with spray paint
So, this is the complete guide that I have written to help you guys in making galaxy with spray paint cans.
This guide is a step-by-step process so you won’t be confused in any step because I have used easy terms so amateurs can also understand what to do.
Even after reading this post if you have any queries then comment on your question then I will make sure the questions get answered quickly.

Matthew Edward is a professional painter who loves to paint and wants to share useful tips and tricks which he had learned in many years of experience in painting. He also used many products that can be used for painting he has tried and tested each and every product to give an unbias opinion about it in his review. This blog is very useful for those newbies who want to learn painting without making mistakes.


