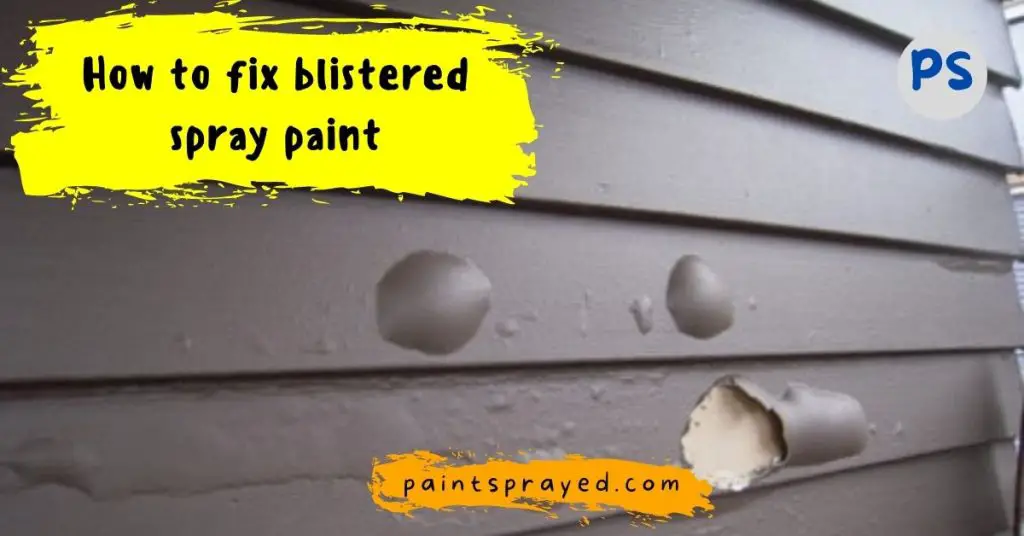
In this guide, I will teach you the complete method to fix your blistered spray paint which was caused due to some reasons which I will also explain.
This guide will be for sure very helpful to newcomers who wanted to fix this issue but were hesitant to do this job by themselves.
For those newbies who are new in this field, this step-by-step will help them out for sure.
Spray paint is a favorite for many for two reasons: its affordability and its accessibility. It’s sold in a wide variety of colors, as many as twenty to be exact.
It is easy to apply, and so long as it’s applied to a flat surface, you can use it on nearly any wall surface – not to mention you don’t need to prepare the wall beforehand.
While spray paint does have some great benefits, one issue that often arises when painting with this type of paint is what we like to refer to as the “bubble build-up effect”.
Otherwise known as ‘orange peel texture’ in the world of professional painters! While removing this large amount of bubbles takes time and effort,
if your project allows up enough time, it really isn’t all that difficult. And even if pressure is tight on your end, we’ve got an awesome solution that might just save the day.
How to fix blistered spray paint?
Prepare the surface
The surface should be clean, dry, and free of dust and grease, so give the whole thing a good going over with some fine sandpaper.
Once the surface is sound and the paint has been removed, the primer is the next step.
This should be applied with a brush and it needs to be left to dry until it’s touched dry.
Only after this, you can apply the spray paint and give it some time to dry.
Sand the surface
Sanding the surface to fix blistered spray paint is a simple process. Sand the surface lightly in all directions to remove the paint on the surface.
Remove dust and other residue with a rag and tack cloth. As you sand, begin to apply a new coat of paint.
The new coat will fill in the blistered areas. Repeat these steps until you have achieved the desired result. It is important to sand lightly, otherwise, you will remove the paint.
Apply coats to fix blistered spray paint
Ideally, you want the paint to go on thin, but not so thin that you are unable to see the existing coat.
You should be able to see the existing paint, but it should be thin enough that you can see through the white underneath.
As you apply the coats, you will eventually build up the paint to the point where the white disappears and you have a solid color. A good way to achieve this is to start with a really thin coat.
Add a second coat if you are still seeing the white. Keep adding coats, but make them slightly thicker, until the white is entirely gone.
Use primer on the surface
If you’re painting over a wood surface, sanding it is the best way to ensure that the undercoat is smooth as possible.
After doing so, it’s best to apply a primer coat to even out the surface of the wood and get rid of any discoloration.
After the primer has dried, smooth out any brush strokes you might have made, and then you can apply the paint of your choice.
Keep in mind that the surface of the wood needs to be clean. You might want to wipe it down with a tack cloth or even mineral spirits if the surface has dirt or dust.
Method to fix blistered spray paint
Many people ask about how to fix blistered spray paint. Typically, when the paint is too thick, it will get blisters in the can.
The blisters have nothing to do with the paint. It is actually the gas that pushes the paint out of the can that is causing the blisters.
When you are using a can of paint, and you don’t get a smooth coat, you will see small bubbles in the paint. Those bubbles are gas, that has built up in the can.

The gas is normally inert, and it doesn’t hurt the paint. When you are using the paint, the paint on the roller or brush takes longer to dry. This can cause blisters.
There are a couple of ways to fix blistered spray paint. The first way is to make sure there is plenty of paint in the can. The pressure of the gas is lessened when the can is full.
The second way is to shake the can for three to five minutes before you start to spray. The shaking will help mix the paint and the gas so that there are no bubbles in the sprayer.
This will give the paint a nice, thin consistency. These two little tricks will fix a lot of blisters.
Causes of blistered spray paint
The most common reasons for spray paint bubbling or separating on your surface is the temperature and humidity.
If the temperature is too low or too high, the solvents in the paint can react too quickly with the paint itself resulting.
In a reaction that forms bubbles or separates the paint from the surface, you’re working on.
Paints today don’t really dry on their own. The reason they get a “drying time” is that they use volatile solvents that are inert and evaporate over time.
So, if you start putting on a coat before the last one has enough time to dry, it will bubble up.
Also, consider that humidity in the air can make the paint appear drier than it actually is.
So even if you’re spraying in your garage, there’s a good chance that it’s still too wet to go on top of.
Whenever you are working with metal, your outside workspace must be warm and sunny.
When it’s nice out (during the day or early evening), temperatures above fifty degrees Fahrenheit are best as it takes longer for metal to warm up than other materials like wicker or wood.
Also note that metal conducts heat differently so, if the sun moves away from your shop during the course of a project, you may need to move indoors.
Finally, those bubbles only seem to appear if you’ve cleaned your piece but not given it enough time to dry, so maybe try leaving it for a little while before being overly concerned.
Remember: the object you’re going to be painting needs to be clean and dry in order to ensure a smooth finish.
Why does spray paint blister?
Spray paint can blister due to a variety of reasons. Some common causes include applying the paint to a surface that is too hot.
Applying the paint to a surface that is dirty or oily, applying the paint to a surface that is not properly primed, or applying the paint in too many thin layers.
Additionally, using spray paint in humid conditions can also cause blistering.
Do spray paint bubbles go away?
It depends on the cause of the bubbles. If the bubbles are caused by a surface that is dirty or oily, cleaning the surface and allowing it to dry before repainting may resolve the issue.
If the bubbles are caused by applying the paint to a surface that is too hot, allowing the surface to cool down before repainting may also help.
However, if the bubbles are caused by applying the paint in too many thin layers or using the spray paint in humid conditions.
The bubbles may not go away, and the paint job may need to be redone.
How do you fix paint blisters?
To fix paint blisters, you will need to remove the affected paint and start over. Here are the general steps to follow:
- Scrape away the blistered paint using a putty knife or scraper. Be careful not to dig too deep into the underlying surface.
- Sand the area smoothly, using fine-grit sandpaper. Make sure to remove all the blistered paint, feathering the edges of the repair area to blend it into the surrounding paint.
- Clean the surface thoroughly to remove any dust or debris.
- If the blistering was caused by a dirty or oily surface, clean the surface again using a degreaser or trisodium phosphate (TSP) solution. Allow it to dry completely.
- Prime the repair area with a high-quality, oil-based primer. This will help the new paint adhere better and also help to seal the wood.
- Once the primer is dry, apply two or more thin coats of paint, allowing each coat to dry before applying the next.
- Finally, inspect the repair area and touch up as needed.
It’s very important to identify and fix the root cause of blistering before repainting, otherwise, it may reoccur.
How do you fix crackling spray paint?
Crackling, also known as “crazing,” can occur in spray paint when there is a problem with the adhesion of the paint to the surface, or when there are inconsistencies in the paint or the surface.
To fix the crackling spray paint, you will need to remove the affected paint and start over with a new coat. Here are the general steps to follow:
- Scrape away the crackled paint using a putty knife or scraper. Be careful not to dig too deep into the underlying surface.
- Sand the area smoothly, using fine-grit sandpaper. Make sure to remove all the crackled paint, feathering the edges of the repair area to blend it into the surrounding paint.
- Clean the surface thoroughly to remove any dust or debris.
- If the crackling was caused by a dirty or oily surface, clean the surface again using a degreaser or trisodium phosphate (TSP) solution. Allow it to dry completely.
- Prime the repair area with a high-quality, oil-based primer. This will help the new paint adhere better and also help to seal the wood.
- Once the primer is dry, apply two or more thin coats of paint, allowing each coat to dry before applying the next.
- Finally, inspect the repair area and touch up as needed.
It’s very important to identify and fix the root cause of crackling before repainting, otherwise, it may reoccur.
FAQ’s of How to fix blistered spray paint
Conclusion on How to fix blistered spray paint
In this post, I have explained the complete step-by-step process to fix blistered spray paint for newbies who were confused to fix this issue by themselves.
Newbies should follow each step explained in this guide to get the perfect finish. If you want to ask anything then comment down here in this post and I will answer your query.

Matthew Edward is a professional painter who loves to paint and wants to share useful tips and tricks which he had learned in many years of experience in painting. He also used many products that can be used for painting he has tried and tested each and every product to give an unbias opinion about it in his review. This blog is very useful for those newbies who want to learn painting without making mistakes.


