You could save money on property maintenance if you decide to paint the doors in your home.
The best DIY trick is to first use the right tools and then properly prepare yourself by using our guide on steps to paint doors.
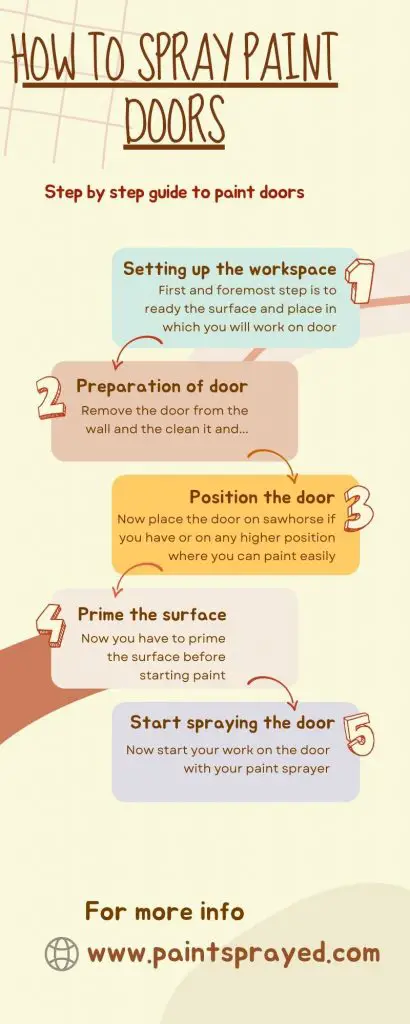
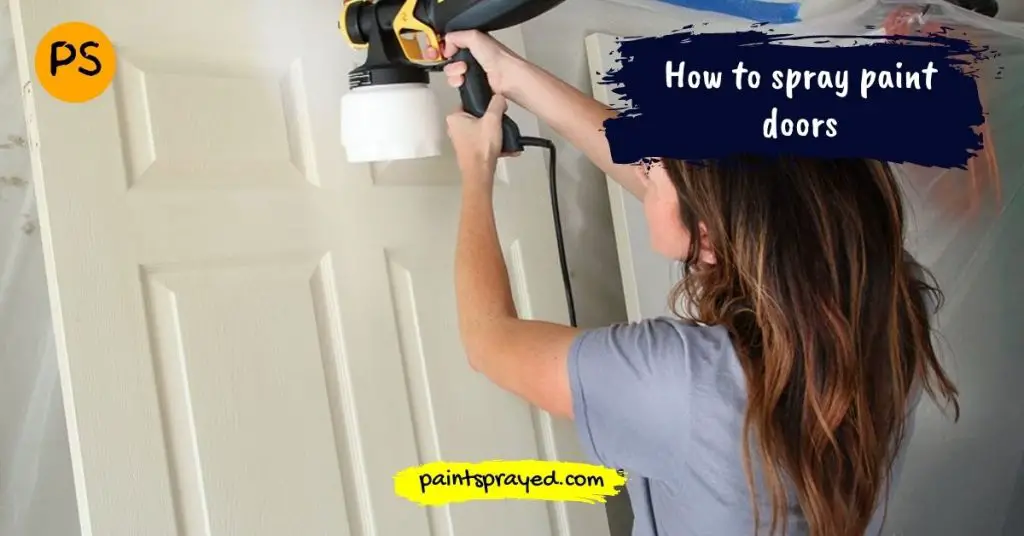
In this post, I will teach you how to spray paint doors with step by step process that is very understandable language.
This guide will help newbies to spray paint doors without creating any mess.
How to spray paint doors?
Why you should spray paint your doors?
Have you ever tried painting a door with a paintbrush? It’s quite a tedious process, isn’t it? Before I begin painting the door.
I think about the size of that tiny little brush compared to how much surface area there is on such a large object like the door, and I start feeling overworked already.
One side of a door might be kind of tricky to paint, but there are tools out there that can easily get the job done for you.
For example, let’s say you want to paint a really big door. First, you would need a wide roller that has plenty of areas so it can cover all sides of the door with no problem.
And the best part is its price tag isn’t very expensive. You might wanna know the method to paint art with spray paint.
Remove the door
Now remove the door and When you’re on the lookout for the right paint, primer, and brush to get started with door painting work, be sure to stock up on plenty of accessories as well.
You should keep in mind some features you’d like your finished product to possess, as well as how much money you want to spend while paying attention to quality.
Make sure not only that your products fit all criteria of your checklist but also that they don’t differ from others in terms of their quality or durability before buying them.
Now ready? Let’s start painting!
Tools we need to spray paint the door
- Rag for cleaning purposes
- Drop cloth(s) (or newspaper) for protection of surface from paint
- Hammer for removing hinges
- Latex paint (or other suitable paint)
- Spray paint
- Paint tray (for roller)
- Primer (if necessary)
- Roller (low-nap)
- Sandpaper for sanding the surface before painting
- Sawhorses (for placing doors on them)
- Screwdriver to unscrew hinges of doors

Use a hammer and screwdriver to remove the door
Take the door out by removing the hinge. Close it so that your hinge opens flat and use a small screwdriver to remove the pin from each side.
If it doesn’t come out easily, hit the back of your screwdriver with a hammer.
Place door on sawhorses
If you don’t have sawhorses you can use a table or any other surface to lay your door on that surface. Position your door in a well-ventilated area or outside.
Make sure that there aren’t any obstacles nearby, and cover the surrounding area with something like old newspapers or drop cloths just in case.
You can also use sawhorses to eliminate the risk of damage to your door and paint job from any spills or splatter. Covering your sawhorses will help protect against dirt and damage too.
Taping process
Store your decor items in a safe place. To ensure your doorknobs don’t get primed or painted during this process.
You should take off any handles, shrubs, and any other features, like clothes hooks.
If you do not plan on removing these from your door, then you might:
Tape the outlines of fixtures such as doorknobs and avoid priming or painting those pieces that can be disassembled by taping around the edges of the fixture, or even completely removing them.
Sand the surface
Sand the door lightly to smooth out any unevenness in the surface of your wood. Using fine-grit sandpaper between 220 and 220-
, sand down the areas where old paint has flaked off leaving a rough, splintered surface.
If necessary, clean your door. To ensure a good look at the wood, your door may have gotten dusty or grimy during sanding.
Use a dry rag or paper towel to remove any dust, dirt, or grime from your door.
Priming the door
You’ll want to prime your door before you paint if there’s no clear coat already on it because priming helps to prepare the surface of your door for the actual coat of paint.
Basically, it fills in any holes or gaps and makes painting easier if your surface is unfinished like back when the door was first made.
If the bare wood has been stained, however, then you probably don’t need to worry about it – because staining means that a thick layer of protection has already been applied.
Choose the appropriate tip size for spray paint
Spraying doors with an airless sprayer is one of those tasks that can be a little tricky at first.
Unless you’re already familiar with this process, it’s very easy to make a mess and waste paint by using an oversized tip.
The solution? Manipulate your application technique by choosing a smaller tip size in order to paint the doors more efficiently!
The application technique is key here because the way you mix your paints can affect the consistency ratio.
Both factors have to be adjusted according to what type of surface you’re painting and what sort of finish you want it to have.
Now, remember that in order to achieve the best results, all these things have to work together harmoniously.
As though they were one big operating system – perfectly balanced and optimized so as not to miss a beat.
For using an airless sprayer to cover interior doors, a 310 or 312 paint tip works great. With this tip, you can coat doors quickly and efficiently with a 6 -inch spray pattern.
Otherwise, if you use a smaller 5- or 4-inch tip, the coverage may be harder to control as the paint will overlap on either end of doors quite easily.
Select the best paint for your door
It is crucial to use the best quality of paint you can afford on your doors. Doors get beaten up faster and easier than walls, so it’s important that the paint is durable and washable.

There are some very important factors to consider when deciding on the best type of paint for your home’s interior doors.
While ‘best’ is always subjective, the most popular choice among homeowners is a low-sheen acrylic paint with an ultra-thin finish.
These paints combine permanent durability with washability and tend not to show surface imperfections like micro-tears from door handles and hinges.
However, if you’re looking for a softer touch, or don’t want to do frequent touchups, a polyvinyl acetate (PVAc) option might be for you.
Aside from its ability to resist yellowing over time and being resistant to chemicals and water damage,.
PVAc paints may offer better coverage in less time due to their increased flexibility while wet.
Painting the door
One of the primary things to remember when you spray paint a door is to take your time.
You need to be patient, as running or skipping will leave you with inconsistent results.
>nd undesirable shading on a newly painted door in comparison to pieces that are sprayed nice and slowly.
Following along with a continuous movement when you are painting a surface is very important! If you start and stop spraying the piece, you will end up with an uneven paint job.
And that is because you’ll have more paint in some areas and less in others. For proper paint coverage, you should overlap each stroke or pass over each area by about one-third.
In addition, to keep your wrist stiff, hold the sprayer 10\12 from the surface whose color you are spraying.
Let the paint dry for at least 48 hours and check if you find any spots which remained and fix those if you find any.
Fix the door back
Moving the door back into its original position can be tough – especially if it is a heavy wooden door. But now that you’re satisfied with the paint job and the paint has fully dried on both sides.
Reinstalling your door should be fairly straightforward. Seat hinges in their holes with their washers and nuts to clamp them through their flanges.
Check to see how much play there is as you tighten each one by holding the door up to it maximum extension.
Then go around and tighten all of them if necessary to bring the play down until there is about 1/16 inch between your fingernail.
And the movable surface of the hinge when you push against it firmly.
Can I paint a door with spray paint?
Yes, you can paint a door with spray paint. However, it is important to properly prepare the surface of the door.
And use a spray paint specifically designed for use on wood or metal surfaces, as not all types of spray paint are suitable for use on all surfaces.
Additionally, make sure to use the spray paint in a well-ventilated area and follow the manufacturer’s instructions for the best results.
Is it better to spray or roll doors?
Both spraying and rolling can be effective ways to paint a door, and the choice between the two methods may depend on the specific situation and desired outcome.
Spraying can be a faster and more efficient method, as it allows for more even and consistent coverage of the surface.
However, it requires more skill and practice to achieve a professional-looking finish, and can also create a lot of oversprays that need to be cleaned up.
Rolling can be a more traditional and straightforward method and is often used by DIYers and homeowners.
It is easy to control the amount of paint being applied and can be used to apply paint in tight spaces or areas that are hard to reach with a spray gun.
However, it can leave roller marks and is a little bit slower than spraying.
Ultimately, the best method for you will depend on your skill level, the size of the door, and the desired finish.
Can you spray paint a door without removing it?
Yes, it is possible to spray paint a door without removing it, but it requires some additional preparation and care to ensure a smooth and even finish. Here are some tips for spray painting a door without removing it:
- Clean the door thoroughly, removing any dirt, dust, or grease from the surface.
- Cover any areas that you don’t want to be painted, such as the doorknob, hinges, and the floor underneath the door.
- Use masking tape and plastic sheeting to protect the edges of the door and surrounding trim.
- Use high-quality spray paint specifically designed for use on wood or metal surfaces.
- Spray the paint in light, even coats, overlapping each pass slightly to ensure full coverage.
- Allow the paint to dry completely before applying additional coats as necessary.
It’s important to note that if you paint the door while it’s still hanging, it will be more difficult to achieve a smooth and even finish than if you removed the door.
Additionally, if the door is too heavy, removing it will be easier and safer.
How do you prepare interior doors for spray painting?
To prepare interior doors for spray painting, you should start by removing any hardware, such as hinges and doorknobs, from the door.
Next, clean the door thoroughly to remove any dirt or grime. If the door has a glossy finish, lightly sand it to rough up the surface and create a better bond for the paint.
Then, fill any holes or cracks with wood filler and sand the filler smoothly once it has dried.
Finally, mask off any areas that you do not want to paint, such as the hinges or weatherstripping, and apply a coat of primer before spray painting the door with your desired color.
FAQ’s of How to spray paint doors
Summary on How to spray paint doors
You’ll love what the HomeRight Super Finish Max can do for you! For this project, all you need is your trusty paint sprayer, and of course – paint.
Start by ensuring that you’ve properly prepared your doors for spraying to remove any loose or flaking paint. Gloss paint will give a smooth finish and create professional results that last.
Do not forget about sealing edges and points in which paint might drip so as to prevent drips from marring the finished look of your doors.
I have explained everything which I know about painting doors with spray paint. This guide will for sure help newbies painting their interior doors without creating any mess.

Matthew Edward is a professional painter who loves to paint and wants to share useful tips and tricks which he had learned in many years of experience in painting. He also used many products that can be used for painting he has tried and tested each and every product to give an unbias opinion about it in his review. This blog is very useful for those newbies who want to learn painting without making mistakes.


