Ready to learn how to clean your HVLP spray gun all by yourself? Well, we’ve got you covered!
While cleaning up after a DIY painting project is normally seen as the end of a long day of work and meaningful accomplishment as you now prepare to move on to the next one.
It’s also an opportunity for you to get acquainted with a new, handy skill that has endless possibilities.
Even if you’re not planning on doing any other painting projects aside from your own in the future.
Proper care for your HVLP spray gun will help ensure that it will keep performing well for years to come.
And thus make sure that this invaluable tool doesn’t have its functionality compromised due to poor maintenance practices.
This guide will be helpful for those newbies who have painted their project and now are hesitant to clean their spray guns without any issues or mistakes so that the spray gun.
Later on, doesn’t make a mess on the surface. Follow each step explained in this guide to properly clean your HVLP spray gun with satisfactory results.
How to clean an HVLP spray gun after use?
Things you need to know before cleaning your HVLP spray gun
Cleaning an HVLP spray gun generally isn’t too difficult to do, but it is very important to do so for long-term maintenance and use.
It might be tempting to put it off for later, but cleaning the spray gun as soon as possible after using it is.
The preferred way because that really is the best way to avoid large issues down the line.
For instance, leaving paint in a gun can leave dry or clogged gun filters which will cause issues when trying to spray paint later on with a consistent pattern
Even if you give it a thorough cleaning job you still might not be able to fully remove all residue in which case buildup may occur inside the airbrush.
And again leads to problems when spraying more paint which will often result in the poor exterior quality of your workstation surface.
With various other tiny pieces like the rubber seals, valve screws, and O-rings included in the gun your paint is stored in.
It’s important to make sure they are clean at all times to lengthen the life of your spray gun. ‘ it’s important to make sure they are clean at all times to lengthen the life of your spray gun.
This is why we recommend cleaning them immediately after use to make sure everything will work right.
Once you get rolling with this process it won’t be too hard for you to keep up each time. The method to use HVLP spray gun is also here in my blog.
Disassemble the spray gun with caution
When it comes to the process of how maintaining a high-volume, low-pressure (HVLP) spray gun, there are many variations that you should consider.
The first thing you’ll want to do is thoroughly research your unique HVLP gun – whether that be online or in your user manual.
For a reference guide detailing how exactly your gun can be taken apart piece by piece.
There are so many reasons why it’s important to take good care of your gun. First, have you ever noticed that all guns are made up of different parts?
Most of them have triggers as well as clips for bullets and a bolt which is what helps the bullet be shot out when the trigger is squeezed.
But like anything else in this world, each gun has its own unique parts and purposes which means whenever you’re dealing with an array of guns.
You’ll want to treat them with a lot of care because otherwise, it will become very difficult if not impossible to put the guns back together again.
Take care of your disassembled parts
When people clean their guns, one of the most common mistakes that they make is not cleaning each part properly so as to not risk damaging them or rendering some of them useless.
They will simply put all the gun parts in a sink basin together and fill it with hot water and soap.
Which causes the liquid to mix with the contaminants from their gun, leading to a murky and unclear solution.
But this method doesn’t actually clean anything. By separating the small pieces of your gun away from the larger ones during cleaning, you can help to preserve its longevity.

Tools we need to clean our HVLP spray gun
Some cleaning kits contain a solvent, which will dissolve the paint that clogs your gun.
Do you already have any of these items on hand? Check the list below to see whether or not you have them:
- Soapy water for cleaning
- Some kind of cleaning solution (Preferably Paint thinner)
- Gloves for protection of hands
- Goggles for protection of eyes
- Cleaning brush for cleaning
- Rags or paper towels for covering the surface
- Buckets for water
- Gun wrench for disassembling spray gun
- Toothpicks for tight spots
One last bit of advice before we get started – make sure you protect yourself from any potential injuries.
It isn’t fun to deal with an injury due to a lack of protection, so be sure that you regularly update your cleaning equipment (especially if you’re working on something particularly rough or difficult).
These things can damage your health in the long run if they come in contact with unprotected parts of your body, so make sure you’re careful.
Cleaning the cap
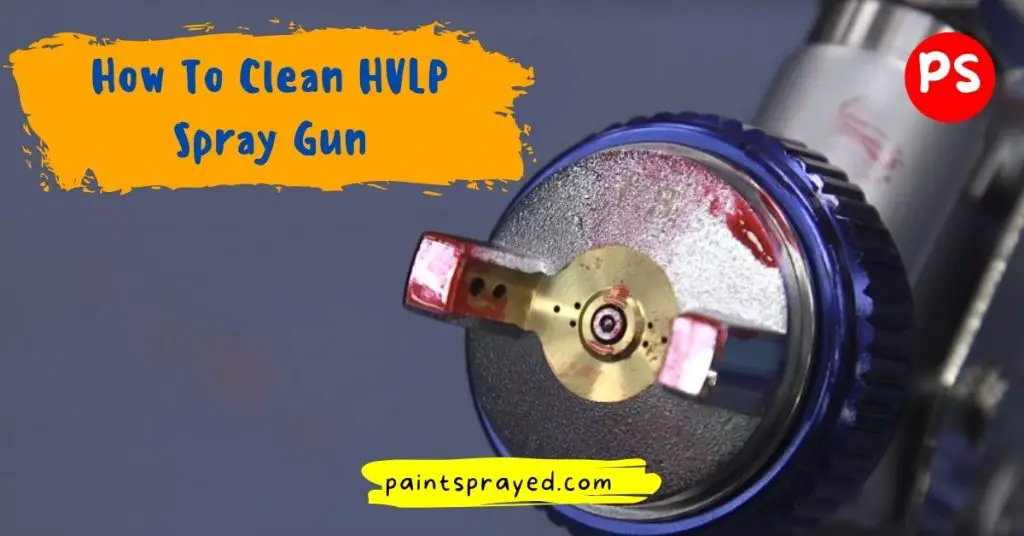
The first step? Cleaning the paint cup! Usually, this part of the gun will have a lot of leftover paint or other liquids in it.
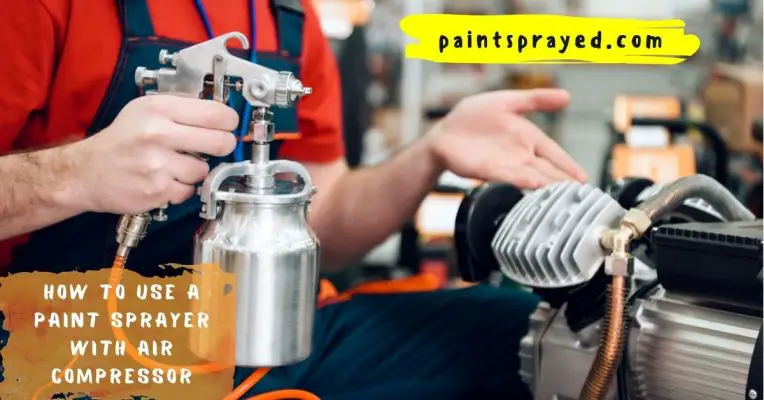
To clean the paint gun properly, you can use an air compressor. Once done, top up with your cleaning agent.
Put on the color bottle and its handle and then pump it once to release all pressurized air.
Pull out the trigger, trying not to trigger it again while doing so but if you are to repeat pull it out.
Without pumping it first you might spray some thinner over your work surface or even worse into your eyes.
To make things as easy as possible when cleaning your spray gun, you should fill up the paint sprayer with thinner.
The thinner will loosen any dried paint pigment that might be hanging around inside the machine and allow some of it to work its way through the inner mechanisms of the spray gun.
To help aid this process, you should use a piece of paper towel with some thinner on it to run through the inside of the cup (while wearing protective gloves).
You want to remove any lingering pieces of paint from inside the main body of your spray gun. Additionally, you’ll want to clean off the inside of your cap with a paper towel and cleaner too.
Now disassemble the spray gun
The next thing is to take your paint bat off and set it down on a paper towel to dry. Then you take the rest of the gun apart.
First, unscrew the air cap and then you’re going to remember when I told you not to let any of these parts get lost.
So, hold onto them all very carefully in your hand or put them down somewhere where they can’t roll away okay?
And now with a wrench, you take off the inner part of the air cap and just those teeny tiny little pieces.
Submerge the disassembled spray gun in thinner
Once the spray gun has been taken apart, you’ll want to clean each piece individually.
We recommend using paint thinner because it makes the work easier, but you could also use a simple cleaning solution or soap and water if you wish to switch it up.
The important thing is that all the pieces are cleaned properly so they don’t get damaged in the process.
It’s easy enough to take care of these smaller parts if you know what you’re doing and if you put a little bit of effort into learning how despite its simplicity.
First of all, you’ll want to separate the pieces into groups. This will help prevent lost parts.
You won’t want any of those springs or needles to get in with the main body or you’ll have to take it apart again to find them!
Now pour a little paint thinner into your plastic cup and dunk each piece fully inside.
Allow it to soak for about a minute as that will give enough time for most of the paint residue inside of these little nooks and crannies to be dissolved.
I’m sure you’ve noticed already but just in case, there’s no need to let your spring get soaked along with everything else.
As you can actually clean it with a toothbrush without removing it from that rod
Wipe everything properly
After you’ve given your cleaning solution a minute or two to settle, it’s time to take the tank.
And atomizer pieces out of the bottle that you mixed them in and start getting ready to wipe them down.
This is where some gentle bristles cleaning brushes come into play as well as some thin toothpicks.
Use the brush to thoroughly clean your drip tips; they should be much easier to clean now having had some time settled.
Some people like to use their thumb after they’ve been cleaned if they are still feeling a little slippery.
But we don’t recommend doing this too harshly because you shouldn’t be pressing too hard on it in order for it not to cause permanent damage or wear and tear on it.
You may find that taking just a little bit of alcohol on a paper towel will do the trick for you if there is still any residue left over from your liquid.
After you clean the ridges and do the inside, you then use a toothpick to clean each ridge on the needle and spring.
The grooves are really hard to reach, so don’t let that discourage you. Take your time and re-clean anything that is still dirty after a few meticulous attempts.
Reassemble the sprayer
Afterward, you’ll assemble the spray gun. First, you place the needle and spring it back into its rightful place.
Next, you screw on the inner air cap while also making sure to insert your outer air cap as well. You’ll then put your paint cup back on your spray gun and replace its lid before that!
Can I use mineral spirits to clean HVLP spray gun?
Yes, you can use mineral spirits to clean an HVLP (high volume, low pressure) spray gun.
Mineral spirits are a type of solvent that can be effective for breaking down and removing paint, grease, and other residues from the spray gun.
However, be sure to follow the manufacturer’s instructions for cleaning the gun to ensure that you do not damage it.
Some spray guns may have specific cleaning recommendations, such as using a particular type of solvent or disassembling the gun in a certain way.
Additionally, be sure to use caution when handling mineral spirits, as they are flammable and can be harmful if ingested or inhaled.
Can you use acetone to clean HVLP spray gun?
Acetone is a strong solvent that can be effective for cleaning an HVLP (high volume, low pressure) spray gun.
It is particularly useful for removing paint and other residues that may be difficult to remove with other cleaners.
However, it is important to follow the manufacturer’s instructions for cleaning the spray gun to ensure that you do not damage it.
Some spray guns may have specific cleaning recommendations, such as using a particular type of solvent or disassembling the gun in a certain way.
Additionally, be sure to use caution when handling acetone, as it is flammable and can be harmful if ingested or inhaled.
What can I use to clean my HVLP gun?
There are several solvents that can be effective for cleaning an HVLP (high volume, low pressure) spray gun, including:
- Mineral spirits: These are a common choice for cleaning spray guns and can be effective for breaking down and removing paint, grease, and other residues.
- Acetone: This is a strong solvent that can be effective for removing paint and other tough residues. However, it can be harsher than other solvents and may not be suitable for all types of spray guns.
- Denatured alcohol: This is a less aggressive solvent that can be effective for cleaning and degreasing spray guns.
- Water: Depending on the type of paint you are using, water may be sufficient for cleaning the spray gun. However, it is important to make sure that the paint is water-soluble before using this method.
It is important to follow the manufacturer’s instructions for cleaning the spray gun to ensure that you do not damage it.
Some spray guns may have specific cleaning recommendations, such as using a particular type of solvent or disassembling the gun in a certain way.
Additionally, be sure to use caution when handling solvents, as they can be flammable and harmful if ingested or inhaled.
How do you clean a spray gun after use?
To clean a spray gun after use, you will need to follow these steps:
- Flush the spray gun with solvent to remove any excess paint or debris. You can use a cleaning solution specifically designed for spray guns or lacquer thinner.
- Remove the nozzle and spray tip, and soak them in the solvent to loosen any dried paint.
- Use a small brush or toothbrush to scrub the inside of the nozzle and spray tip to remove any remaining paint or debris.
- Rinse the nozzle and spray tip thoroughly with water to remove any residue.
- Wipe down the rest of the spray gun with a clean cloth to remove any remaining solvent or paint.
- Reassemble the spray gun and test the trigger to ensure that it is working properly.
- If the spray gun is not going to be used for an extended period of time, it is a good idea to lubricate the seals and gaskets with light oil to prevent them from drying out.
Remember to always use caution when handling solvents and to work in a well-ventilated area.
What solvent to use to clean hvlp spray guns?
When cleaning an HVLP (High Volume Low Pressure) spray gun, it’s important to use the right solvent to ensure that the gun is thoroughly cleaned and free of any residue that could clog the nozzle or affect the quality of the spray.
One of the most commonly used solvents for cleaning HVLP spray guns is lacquer thinner.
Lacquer thinner is a fast-evaporating solvent that can quickly dissolve paint and other coatings, making it an effective cleaner for HVLP guns. It’s also readily available at most hardware stores and paint supply stores.
Other solvents that can be used to clean HVLP spray guns include denatured alcohol, mineral spirits, and acetone.
These solvents are also effective at dissolving paint and coatings, but may not be as fast-evaporating as lacquer thinner, so they may require more time to completely clean the gun.
When cleaning an HVLP spray gun, be sure to follow the manufacturer’s instructions for disassembling and cleaning the gun.
Use the appropriate solvent to clean each part of the gun thoroughly, and be sure to use a cleaning brush to remove any stubborn residue.
Once the gun is clean, rinse it with water and dry it thoroughly before reassembling and storing it.
FAQ’s of How To Clean HVLP Spray Gun
Final Thoughts on How To Clean HVLP Spray Gun
So, here is the complete guide on how to clean your HVLP spray gun with step by step guide so you don’t make any mistakes during the process of cleaning and get satisfactory results.
If you have any queries regarding this post then let me know in the comments section so I can solve them and clear out your confusion regarding that specific problem.
Cleaning an HVLP spray gun will quickly become one of your favorite parts of the painting.
It’s much easier to do it right the first time than to have to correct a mistake down the line!
Here’s how to do it: To start, turn off the compressor and unplug the gun from the electrical outlet.
Next, remove all larger pieces that may be slowing down its performance like dirty cups or flaps under the paint tips.
After removing these things, thoroughly clean any bits that might still have clinging paint residue on them.
You can do this by mixing some solvent with warm water in a sponging pot, submerging the pieces in it, and rubbing gently but firmly with a paper towel until all of the old pieces are gone.
Lastly, allow hot water to run through the bit holes for about five minutes before blasting air through them with your compressor again. Now you’re ready to paint once more!
Sometimes it’s a really real bummer when you get the paint on yourself. This can happen when the nozzle starts to clog or if there is a buildup on the paint gun itself.
So as much as possible, try to avoid getting leftovers of your beloved craft project all over yourself (unless it’s some kind of crazy art project that purposefully requires it).

Matthew Edward is a professional painter who loves to paint and wants to share useful tips and tricks which he had learned in many years of experience in painting. He also used many products that can be used for painting he has tried and tested each and every product to give an unbias opinion about it in his review. This blog is very useful for those newbies who want to learn painting without making mistakes.


