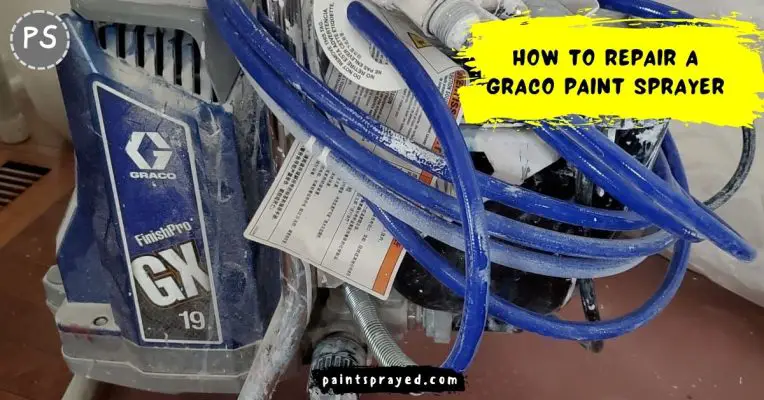
Graco paint sprayers are widely used by professionals and DIY enthusiasts alike for their efficiency and speed in painting large surfaces.
However, even with proper maintenance, paint sprayers can experience some issues that need fixing. How to repair a graco paint sprayer is written by a professional painter who has shared his knowledge and experience.
Whether it’s a clogged hose, a faulty pressure control, or a broken motor, repairing a Graco paint sprayer can be a daunting task
How to repair a graco paint sprayer?
Graco paint sprayers are a great tool for any DIY enthusiast or professional painter. They offer a fast and efficient way to paint large surfaces, providing a smooth and even finish.
However, like any tool, paint sprayers are prone to wear and tear over time and may require some maintenance or repair work.
In this article, we’ll guide you through the steps of repairing a Graco paint sprayer so you can get back to your painting projects as soon as possible.
Step 1: Identifying the Problem
The first step in repairing a Graco paint sprayer is to identify the problem. Some common issues with Graco paint sprayers include clogged spray tips, leaks, or problems with the motor.
Before you start repairing your paint sprayer, make sure to turn it off and unplug it to avoid any accidents.
Step 2: Clearing Clogged Spray Tips
One of the most common problems with Graco paint sprayers is a clogged spray tip. This can happen when paint builds up in the tip and restricts the flow of paint.
To clear a clogged spray tip, follow these steps:
- Remove the spray tip from the paint sprayer by loosening the tip guard.
- Clean the tip with paint thinner or solvent, using a small brush to remove any build-up of paint.
- Reinstall the tip and tighten the tip guard.
- Test the sprayer to see if the problem has been resolved.
Step 3: Repairing Leaks
Leaks can occur in several places on a Graco paint sprayer, including the hose, the spray tip, or the fluid container. To repair a leak, follow these steps:
- Locate the source of the leak by examining the hose and spray tip for any cracks or damage.
- If the leak is coming from the hose, replace the hose with a new one.
- If the leak is coming from the spray tip, replace the tip with a new one.
- If the leak is coming from the fluid container, tighten the connections and check for any cracks in the container. If the container is damaged, replace it with a new one.
Step 4: Repairing the Motor
If your Graco paint sprayer is not working properly, the motor may be the cause. To repair the motor, follow these steps:
- Disassemble the paint sprayer to access the motor.
- Check the motor for any signs of damage, such as burn marks or broken parts.
- If the motor is damaged, replace it with a new one.
- Reassemble the paint sprayer and test it to see if the problem has been resolved.
How do you troubleshoot a Graco paint sprayer?
Here are some common problems and their solutions for troubleshooting a Graco paint sprayer:
- Spray gun not spraying:
- Check to make sure the spray gun is properly assembled and tightened.
- Make sure the fluid needle and fluid tip are clear of any blockages.
- Check the air pressure and adjust it if necessary.
- If the fluid delivery system is clogged, clean it according to the manufacturer’s instructions.
- Poor spray pattern:
- Make sure the fluid tip is the correct size for the material being sprayed.
- Check the air pressure and adjust it if necessary.
- Check the fluid needle and fluid tip for any damage or wear.
- Make sure the material being sprayed is not too thick.
- Overspray:
- Reduce the air pressure.
- Make sure the fluid tip is the correct size for the material being sprayed.
- Make sure the material being sprayed is not too thin.
- Check the spray gun’s fan control for proper setting.
- Uneven coverage:
- Check the air pressure and adjust it if necessary.
- Make sure the fluid tip is the correct size for the material being sprayed.
- Check the spray gun’s fan control for proper setting.
- Make sure the spray gun is being held at a consistent distance from the surface.
If these solutions do not resolve the issue, you may need to consult the manufacturer’s instructions or seek professional assistance.
Why is my paint sprayer not holding pressure?
There are several reasons why a paint sprayer may not hold pressure:
- Clogged filter: The inlet or suction filter may be clogged, preventing the pump from drawing material into the hose. Clean or replace the filter if necessary.
- Worn seals: Worn or damaged seals can allow air to escape, causing the pressure to drop. Check the seals for wear and replace them if necessary.
- Air leaks: Air leaks can cause the pressure to drop. Check the hoses and connections for any cracks or leaks, and replace or tighten as needed.
- Blocked nozzle: If the nozzle is blocked, it can prevent the material from flowing through the sprayer, causing the pressure to drop. Clean the nozzle and remove any blockages.
- Damaged pump: If the pump is damaged, it may not be able to maintain pressure. Inspect the pump for any signs of damage, such as cracks or leaks, and replace it if necessary.
If you are unable to resolve the issue, it is best to consult the manufacturer’s instructions or seek professional assistance.
How do you fix an airless sprayer that is not priming?
Here are some steps to troubleshoot an airless paint sprayer that is not priming:
- Check the fluid inlet filter: The fluid inlet filter may be clogged, preventing the paint from flowing into the pump. Clean or replace the filter if necessary.
- Check the pump inlet and outlet: The inlet and outlet of the pump may be clogged, preventing the paint from flowing. Clean the inlet and outlet if necessary.
- Check the hoses: The hoses may be kinked, preventing the paint from flowing. Straighten the hoses if necessary.
- Check the pressure control knob: The pressure control knob may be set too low, preventing the pump from building enough pressure to prime. Adjust the knob as necessary.
- Check the pump seals: The pump seals may be worn or damaged, causing the pump to lose its prime. Check the seals for wear and replace them if necessary.
- Check the power source: Make sure the sprayer is properly plugged in and the outlet is functioning properly.
- Check the prime valve: The prime valve may be clogged or not functioning properly. Clean or replace the valve if necessary.
If these steps do not resolve the issue, it may be necessary to consult the manufacturer’s instructions or seek professional assistance.

How do you service an airless sprayer?
Here are some general steps for servicing an airless paint sprayer:
- Clean the sprayer: Clean the sprayer thoroughly after each use to prevent buildup of paint and other materials.
- Change the fluid filter: The fluid filter should be changed regularly to ensure the paint flows smoothly through the sprayer.
- Lubricate the moving parts: Regularly lubricate the moving parts of the sprayer, such as the pump and spray gun, to keep them functioning properly.
- Check the hoses: Inspect the hoses for cracks, leaks, or other damage, and replace them if necessary.
- Check the seals: Inspect the seals for wear and replace if necessary.
- Check the nozzle: Inspect the nozzle for blockages and clean or replace it if necessary.
- Store the sprayer properly: Store the sprayer in a clean, dry place to prevent damage or buildup of paint or other materials.
It is important to follow the manufacturer’s instructions for servicing your specific airless sprayer, as the steps may vary based on the model and design.
If you are unsure about how to service your sprayer, it is best to consult the manufacturer’s instructions or seek professional assistance.
Why is my Graco Ultra not spraying?
There are several reasons why a Graco Ultra paint sprayer may not be spraying:
- Clogged filter: The inlet or suction filter may be clogged, preventing the pump from drawing material into the hose. Clean or replace the filter if necessary.
- Worn seals: Worn or damaged seals can allow air to escape, causing the pressure to drop. Check the seals for wear and replace them if necessary.
- Air leaks: Air leaks can cause the pressure to drop. Check the hoses and connections for any cracks or leaks, and replace or tighten them as needed.
- Blocked nozzle: If the nozzle is blocked, it can prevent the material from flowing through the sprayer, causing the pressure to drop. Clean the nozzle and remove any blockages.
- Clogged fluid line: If the fluid line is clogged, it can prevent the material from flowing through the sprayer. Clean the fluid line if necessary.
- Damaged pump: If the pump is damaged, it may not be able to build enough pressure to spray. Inspect the pump for any signs of damage, such as cracks or leaks, and replace it if necessary.
If you are unable to resolve the issue, it is best to consult the manufacturer’s instructions or seek professional assistance.
How do you clean a clogged Graco paint sprayer?
Here are some steps to clean a clogged Graco paint sprayer:
- Turn off the sprayer: Turn off the sprayer and disconnect it from the power source.
- Drain the fluid: Drain any fluid remaining in the sprayer into a container for disposal.
- Clean the nozzle: Clean the nozzle with a brush or solvent to remove any blockages.
- Flush the hose: Flush the hose with a cleaning solution or solvent to remove any buildup.
- Clean the pump: Remove the pump and clean it with a cleaning solution or solvent to remove any buildup.
- Clean the fluid filter: Clean or replace the fluid filter to ensure the paint flows smoothly through the sprayer.
- Reassemble the sprayer: Reassemble the sprayer and test it to make sure it is functioning properly.
It is important to follow the manufacturer’s instructions for cleaning your specific Graco paint sprayer, as the steps may vary based on the model and design.
If you are unsure about how to clean your sprayer, it is best to consult the manufacturer’s instructions or seek professional assistance.
Verdict on how to repair a graco paint sprayer
In conclusion, repairing a Graco paint sprayer can be a simple or complex process, depending on the issue at hand.
Common issues such as clogged nozzles, worn seals, and clogged fluid lines can be resolved with a few simple steps such as cleaning the nozzle, replacing the seals, and flushing the fluid lines.
Hope you read and applied all the steps explained above in my blog post and still if you have any confusion in your mind feel free to ask in comments section.

Matthew Edward is a professional painter who loves to paint and wants to share useful tips and tricks which he had learned in many years of experience in painting. He also used many products that can be used for painting he has tried and tested each and every product to give an unbias opinion about it in his review. This blog is very useful for those newbies who want to learn painting without making mistakes.


