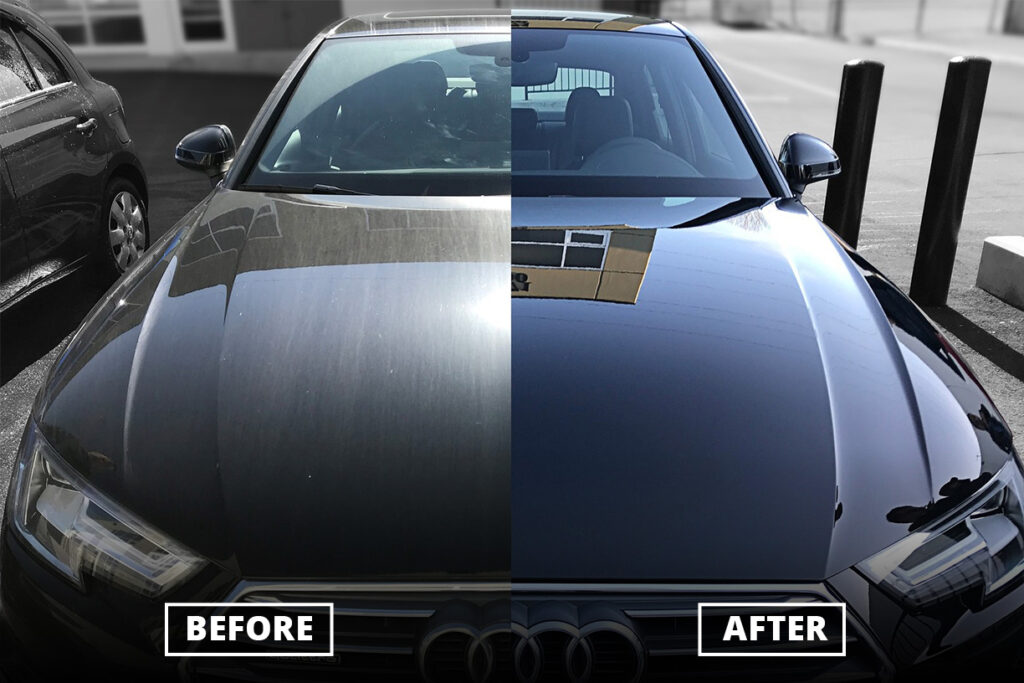
The clear coat is a protective layer applied over a painted surface, commonly used in various applications, including wood finishing and painting. Its primary purpose is to enhance the appearance of the painted surface, providing a glossy finish and protecting it from environmental factors. For more information on whether can you paint over a clear coat, see this article.
When opting to paint over clear coat, it’s important to follow proper preparation steps. Sanding the clear coat can provide a suitable surface for the new paint to adhere to, ensuring a lasting and professional finish. This process also aids in smoothing out any imperfections that may be present in the existing clear coat.
How to prepare the surface before starting to paint over clear coat?
To achieve a successful job over a clear coat, proper surface preparation is crucial. Here’s a step-by-step guide on how to prepare the surface before painting:
Clean the surface and identify and repair damages
Start by cleaning the entire surface thoroughly to remove any dirt, grease, or contaminants. Use a mild automotive detergent and water to ensure a clean starting point.
Inspect the surface for any damages, deep scratches, or imperfections. Repair any existing damage using appropriate techniques, such as filling deep scratches with body filler and sanding.

Wet sand the fresh coat and surface correctly for adhesion
Wet sand the clear coat using wet sandpaper and a sanding block. Wet sand helps remove the glossy shine and creates a textured exterior for the paint to adhere properly. Use a back-and-forth motion, keeping the surface wet during sanding.
Ensure that the surface is sanded correctly to promote paint adhesion. Pay special attention to edges and corners, where clear coats may be more challenging to remove.
Clean and dry the surface and apply primer
Thoroughly clean the surface again to remove any grinding residue. Allow the surface to dry before proceeding to the next steps.
Spray a varnish evenly over the sanded exterior. The primer coat helps the new paint adhere properly and provides a smooth foundation for the exterior. Allow it to dry.
Choose the right paint and apply the base coat
Select an enamel paint a new color that is compatible with the primer and base coat. Ensure you have enough paint for the entire job and that it is suitable for the desired finish.
Spray a thin, even layer of the base coat over the primed surface. Apply paint can at a consistent distance and use sweeping motions for an even application. Allow the base coat to dry.
Apply additional coats if necessary and protect and seal
Depending on the desired outcome, apply additional coats of paint. Follow the manufacturer’s instructions regarding drying times between coats.
Once the new paint job is complete, consider applying a clear coat for added protection and a glossy finish. Allow the final clear coat to dry thoroughly to achieve a professional look.

How to choose the right paint to paint over clear coat?
When considering types of paint for painting over a clear coat, it’s crucial to select products that work together seamlessly to achieve a professional finish.
Base coat: The base coat serves as the initial layer of paint applied over the primed exterior. It provides color and prepares the exterior for additional coats.
Enamel paints: Enamel paint is a durable and glossy type of paint commonly used for automotive applications. It creates a smooth and polished finish.
Clear coat: The clear coat is the final layer of paint applied to protect and enhance the finish. It adds depth and provides a glossy shine to the previously painted exterior.
Premiering: It is a preparatory varnish applied before the base coat to promote adhesion and create a surface for coloring.
Spray paint: A spray base coat of paint is a convenient method for applying an even and consistent layer of paint. It is commonly used for base coats and clear coats in automotive painting.
Wet sanding process: Wet sanding involves using sandpaper and water to smooth and level the exterior. It is often done between coats to achieve a flawless finish.
Paint stripper: This paint is a chemical product used to remove old paint or clear varnish coats. It is especially useful when dealing with surfaces that have multiple coats of paint.
Microfiber towel: A microfiber towel is used to gently clean the exterior between coats, removing any dirt or particles that may affect the quality of the job.
Bare metal: Bare metal refers to the exposed metal exterior after removing old paint or clear coat. It often requires priming before applying the base varnish.
New clear coat: A new clear coat is applied as the top layer to protect the paint job and provide a glossy finish. It enhances the overall durability and aesthetic appeal.
Old coat: The old clear coat may need to be removed or sanded down before applying new paint to ensure proper adhesion.
Multiple Layers: Applying multiple coats, including the varnish, clear coat, and any additional coats, contributes to a more durable and visually appealing paint job.
Can you paint over clear coat yourself?
Yes, you can paint over the clear coat yourself with proper preparation and care. Here’s a step-by-step guide:
Prepare the surface to paint job and assess the clear coat
Start by cleaning the car exterior thoroughly to remove dust, debris and other imperfections. Ensure the exterior is completely clean before proceeding.
Inspect the clear coat for any damage, peeling, or imperfections. If the clear coat is in good condition, you can proceed with painting directly over it.
The sanding process the clear coat and clean the exterior
Use sandpaper to lightly sand the clear coat. Sand helps create a textured exterior for the new paint to adhere to. Grinding also helps remove any shine.
After sanding, clean the exterior to remove any grinding residue. Ensure the exterior is dry and free of dirt before applying any tint.
Apply primer and choose the paint
If you encounter bare metal or areas with a damaged clear coat, apply it to create a smooth and even exterior. Allow the coat to dry.
Select the paint color you want to apply. Ensure the chosen tint is compatible with the primer and any existing clear coat.
Start painting and assess the result
Begin by applying the first coat of paint. Hold the spray can at a consistent distance and use a back-and-forth motion for even coverage. Allow the first or second coat to dry.
After the first coat has dried, assess the result. If necessary, sand lightly between coats to address any imperfections and create an exterior.
Apply paint and apply clear coat finish
Apply additional coats as needed, allowing each layer to dry before applying the next. The number of coats depends on the desired color intensity and finish.
For added protection and a glossy finish, consider applying a clear coat as the next layer. This enhances the durability and aesthetic appeal of the paint job.
Protective measures and cover surrounding areas
Wear appropriate protective gear, including a mask and safety glasses, to protect yourself from fumes and particles during the painting process.
Use drop cloths or plastic sheets to cover surrounding areas and protect them from overspray.

Can you paint over a clear coat: how to avoid common mistakes?
Avoiding common mistakes when painting over a transparent coating requires careful preparation and attention to detail.
Inspect the clear coat and don’t paint over clear coat
Carefully inspect the existing clear coat on the car. Ensure it’s in good condition without major damages.
While it may be tempting, avoid painting directly over the clear coat if it has imperfections. Sand the surface lightly to promote paint adhesion.
Sanding preparation and cleaning the surface
Use a griding block or sandpaper to lightly sand the clear coat. Sand creates a textured exterior for the tint to stick and removes the shine.
Thoroughly clean the sanded surface to remove any dust, debris and other imperfections. A clean surface ensures the paint adheres properly.
Apply primer and select the right paint
Apply a suitable primer over the sanded exterior, especially if the clear coat is damaged or if you encounter bare metal. Wait while the primer dries.
Choose a high-quality paint that is compatible with the primer and any existing clear coat. Ensure the color and finish match your desired outcome.
Spray paint evenly(applying paint) and allow drying time
When applying the paint, use a consistent and even spraying motion. Holding the spray can at the right distance helps prevent uneven coverage and streaks.
Allow each varnish of paint to dry before applying additional coats. Rushing the process can lead to an uneven or blotchy finish.
Sand between coats and check for an ugly finish
Optionally, lightly sand between coats to address any imperfections, ensuring a smooth surface for the next layer with light sand.
Regularly inspect the previously painted exterior for any signs of an “ugly finish,” such as uneven application or paint runs. Address issues promptly.
Consider clear coat finish and protective gear
If desired, apply all the clear coat directly as the final layer for added protection and a glossy finish. Ensure it is compatible with the base coat.
Wear appropriate protective gear, including a mask and safety glasses, to protect yourself during the painting process.
Following these steps and paying attention to the details can avoid common mistakes when painting over a transparent coating and achieve a professional-looking finish on your car.
How to remove clear coat?
To remove clear coat directly and prepare the exterior for a new job:
Assess the clear varnish and begin sanding
Inspect the existing clear coat for imperfections, damages, or signs of wear. If the clear coat is compromised, removing it may be necessary.
Start the removal process by sanding the clear varnish using sandpaper or a begin sanding block. This step helps create a textured exterior for the paint to adhere to.
Wet sanding and clean the surface
Consider wet sanding for a smoother removal process. Wet sandpaper and water can be used to sand the clear coat more effectively and minimize dirt.
Clean the sanded exterior thoroughly to remove any residue. A clean exterior ensures better adhesion for the subsequent layers of paint.
Inspect for remaining clear coat and paint underneath
After sanding, inspect the surface to ensure all the clear coat has been removed. Address any areas where the clear coat persists.
If the clear coat is fully removed, you may encounter the paint layer underneath. Ensure the exposed paint is in good condition without major imperfections.
Begin applying fresh paint and apply a top coat
Once the surface is prepared, you can begin applying paint. Choose a high-quality paint suitable for your project.
After applying the base coat, consider adding a coat for added protection and a glossy finish. Ensure compatibility between the base coat and coat.
Wet sand if necessary and allow to dry
If imperfections or uneven areas are present after the fresh paint application, you can wet sand again between coats to achieve a smoother finish.
Allow each varnish of paint to dry completely before proceeding to the next step. Patience is crucial for achieving a professional-looking result.
Inspect for imperfections and stick to recommended drying times
After the paint has dried, inspect the surface for any imperfections. Address and correct any issues before adding additional coats if necessary.
Follow the recommended drying times for the paint products used. Rushing the process can lead to an uneven or poorly cured finish.

Matthew Edward is a professional painter who loves to paint and wants to share useful tips and tricks which he had learned in many years of experience in painting. He also used many products that can be used for painting he has tried and tested each and every product to give an unbias opinion about it in his review. This blog is very useful for those newbies who want to learn painting without making mistakes.


