Today I will teach you the method to paint your yeti cups. Well, if you think about the process then you might get self-confused if you are a newbie in the field.
But you don’t have to worry about it cause I have come up with a solution.
It will be a step-by-step guide and very easy to follow for amateurs also who are struggling with painting yeti cups.
Yeti Cups are great for keeping drinks cold, but if you want to turn your Yeti into a custom work of art you could give it a much-needed makeover with spray paint!
Pick out your favorite color and start covering every inch of the Yeti in a few coats to make it less of a functional drinking cup.
And more of an original and interesting piece to represent your personality.
If you don’t have access to your own Yeti there are companies like [STARBUCKS] that will be able to help you create something.
Similar using their wider range of materials, such as this stainless-steel cup that can be sized to fit your chosen design.
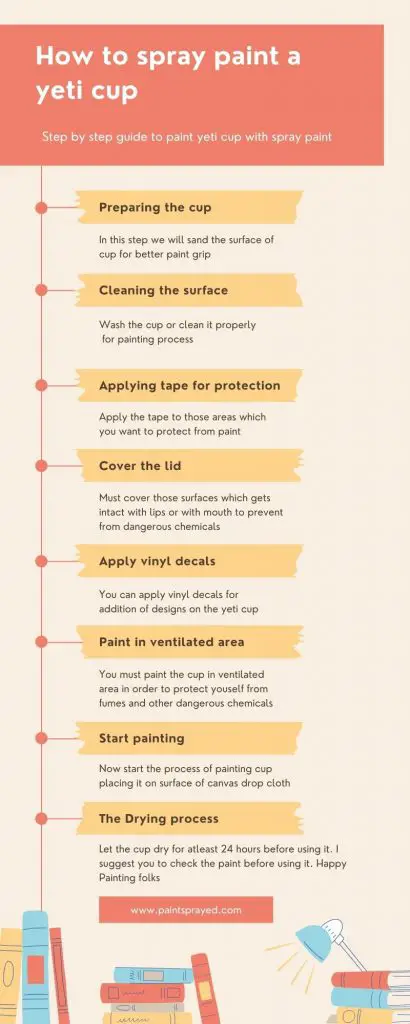
How to spray paint a yeti cup?
Prepare the cup for the painting process
In the time it takes to paint your cup, you can use fine-grit sandpaper in combination with an electric sander or even a power drill.
(Although I don’t recommend painting a cup that is being held by a machine since things may get sticky) to smooth out any rough spots.
Gently run the sandpaper along with your cup until it is noticeably smoother. The more smoothly your cup is, the easier it will be for you to apply the paint evenly.
If your sandpaper becomes worn out while you are sanding your cup, simply grab another piece of sandpaper and keep going!
Now clean the surface
Soak your lovely, colorful cup in a sink of hot soapy water for about 5-10 minutes. Scrub it with the sponge to get all of the gunk and grease off of it.
When you’re done, remove the cup from its temporary home and place it on top of a towel while still in the sink.
Apply the tape to save from paint
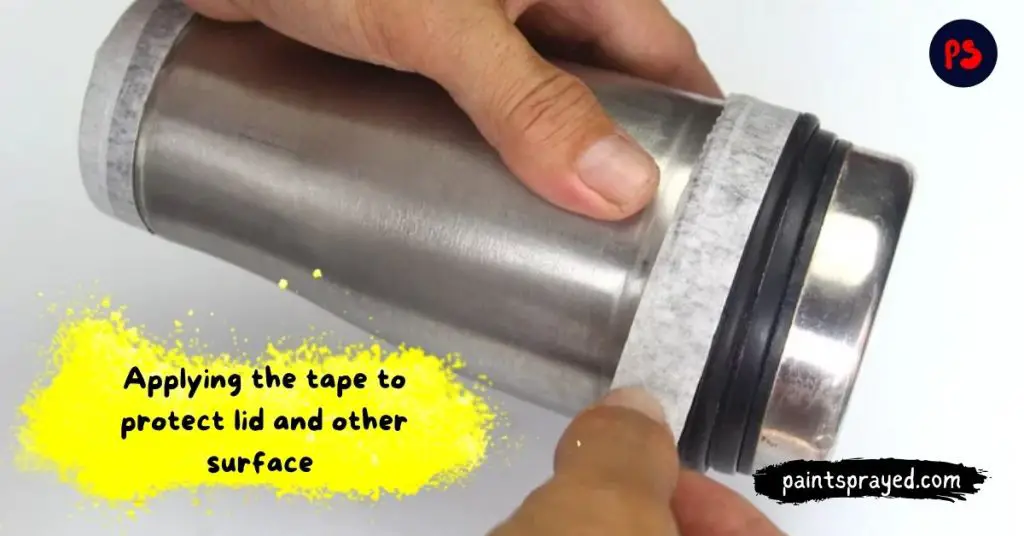
Apply the tape on those surfaces which you don’t want to paint accidentally. The first step in painting a mug is to cover the cup’s lip and other areas you don’t want to be painted.
One way of achieving this is by using strips of blue painter’s tape.
By applying the tape to the cup’s lip, you’ll make sure that your head won’t come in contact with any part of its paint job when you drink from it.

However, you may find it necessary or desirable to apply tape in some other places on your mug too.
In some situations, for example, it makes sense to use two strips of painter’s tape framing the project area so that there are three unpainted parts within it.
Now cover the opening
The opening on a Yeti cup should be covered with plastic. One needs to make sure that no paint gets into their drink as it could cause some serious harm.
Simply wrap some plastic over the opening of your mug and hold it in place with a rubber band or painter’s tape.
You can also seal the lid in a plastic ziplock bag and then put the covered lid over the opening after it’s sealed shut.
Apply vinyl decals for designing
Apply vinyl decals to your cup if you want to paint a design. Vinyl decals work as a stencil for the spray paint and help you apply fun, creative designs onto your Tervis cup.
Put your favorite team’s logo on your cup, put your name on it, or just make an outline of an animal you like. Find these vinyl decals online and be as creative as you want with them.

Take the cup to the ventilated area for better results
Make sure you’ve at least set up a tent or some sort of structure that can protect the lower half of your body since you will be kneeling while painting.
Your lungs and eyes will breathe in paint fumes all day, so make sure you are working in an area with open windows and doors.
If weather permits, a very smart idea would be to do this project outdoors instead of indoors.
And last but not least, be outside of any windows nearby if you can – this way the dangerous paint fumes won’t seep into your home!
Protect your rug by laying down a newspaper or plastic sheeting beforehand while setting up the sprayed item.
Placing a cup on a cardboard surface
Set your cup upside down on an old cardboard box or canvas drop cloth. Make sure the cup is stable and will not fall over while you’re painting.
It’s best to work on a surface that you don’t mind getting paint on because it will likely happen. Try to keep paint out of your cup by putting it upside down!
A surface you can easily tidy up spills on such as an old cardboard box or a drop cloth will help keep the area clean where you are working.
Now comes the painting part
Now shake the spray paint before using it for almost 10-15 seconds for better results on the cup. Shaking will help the ingredients to mix up properly.
How to hold and spray with spray paint
Maintain a safe distance between the spray paint can and the cup. Keep approximately 1ft (30 cm) of space between the two whenever possible.
Although it’s difficult to reach that far at times, you’ll get better coverage with your coat if you’re less reliant on maintaining precise proximity.
Checking for drips is also much easier from afar – since they’re hard to see in dark colors, which makes them more likely to happen anyway.
Spraying thin layers of paint
The best thing you can do is to apply a thin coat. If you apply too much, it will just pool in places and look blotchy instead of uniform throughout.
Find someone else who has used the sprayer before or look online to see how people recommend mixing the paint and water depending on what kind of surface you’re painting.
The paint should be as diluted as possible but still opaque enough so that it looks even when applied.
If you still have trouble, there are tutorials you can find by searching on YouTube to help troubleshoot the process.
Now let the paint dry for at least 15 minutes. But check the paint before applying a second coat of spray paint.
Applying more coats of paint
Apply at least 2-3 additional coats of paint. You can apply additional coats of paint as often and thickly as you want until the surface is the exact shade of your choosing.
Be sure to allow time for each coat to dry before adding another one on top.
For better protection of paint apply sealer
Apply a coat of polyacrylic sealer to the paint on your cup.
The sealer helps to make your work feel smooth and will help keep out moisture and other elements that might wreak havoc as time passes.
Use a small brush to apply an even coat of the sealer over all of the painted parts of the cup.
Let the sealer dry
Before you apply the sealer, you should allow your paint to dry for at least 15 minutes.
If the directions on your paint container are unclear about how long it will take for your chosen coating to be fully set.
Look online for information from another source that might help. It’s important to remember that as with any other kind of painting project, one coat of sealer won’t do.
You have to apply a minimum of two coats in order to create a smooth finish that offers sufficient protection against dust, moisture, and wear across different surfaces.
Apply 2 or 3 coats more for better protection of paint with sealer. I suggest you do more coatings because I have been using paint sealers.
And they have given me pretty good results which I praise and suggest to you guys too.
Remove the tape which you applied
Remove the painter’s tape if you put it on your wall. If you can’t pick the tape away from your fingernails, use the edge of your scissors or a different tool to start peeling it back.
Once you pull it away, your chosen design should be left behind as an unpainted area.
Let the cup dry
It’s recommended to let your cups dry before using them again. You can usually do this by setting the cups upside down or propping them up against something on their side.
Completing this step will take about 24 hours, but it’s worth the wait! Take any feedback from friends and family and consider painting more Yeti cups for people you know.
It can be a great way to show off your artistic skills and make fantastic gifts for individuals who are important in your life.
Tips:
- Don’t apply the sealer on the lip of the cup because it is dangerous.
- Also, don’t spray paint near an open flame.
What kind of paint do you use on a Yeti?
It is generally not recommended to paint a Yeti brand tumbler or cooler as the paint may not adhere properly and could potentially damage the product.
Additionally, painting a Yeti may void the warranty.
If you still want to paint your Yeti, it is important to use a high-quality, specialized paint that is specifically designed for use on metal surfaces.
You should also thoroughly clean and dry the surface of the Yeti before applying the paint to ensure that it adheres properly.
It is also a good idea to test a small, inconspicuous area before painting the entire tumbler or cooler.
It is important to follow the manufacturer’s instructions and use caution when painting any product.
It is always a good idea to consult with a professional if you are unsure about how to properly paint a product.
What kind of paint do you use for tumbler cups?
There are several types of paint that can be used on tumbler cups, including acrylic paint, enamel paint, and epoxy resin.
Acrylic paint is a popular choice for tumbler cups because it is water-based, dries quickly, and is relatively inexpensive.
It is also easy to clean up and can be thinned with water. However, acrylic paint may not be as durable as other types of paint, so it may need to be reapplied more often.
Enamel paint is another option for tumbler cups. It is oil-based, which makes it more durable and resistant to chipping and scratching.
However, it may take longer to dry and may be more difficult to clean up than acrylic paint.
Epoxy resin is a type of clear, two-part paint that is often used on tumbler cups to create a glossy, professional finish.
It is extremely durable and resistant to chipping and scratching, and it dries to a hard, glossy finish.
However, it is more expensive than other types of paint and can be more difficult to work with.
Regardless of the type of paint you choose, it is important to thoroughly clean and dry the surface of the tumbler cup before applying the paint to ensure that it adheres properly.
You should also follow the manufacturer’s instructions and use caution when painting any product.
It is always a good idea to consult with a professional if you are unsure about how to properly paint a product.
How do you Hydro dip a Yeti Cup with spray paint?
Hydro dipping, also known as water transfer printing, is a process that involves applying a design to a surface using water and special paints.
It is a popular technique for decorating tumbler cups and other objects. Here is a general outline of the process for hydro dipping a Yeti cup using spray paint:
- Gather the necessary materials: You will need a container of water, hydro dip film, spray paint, a Yeti cup, and some masking tape or painter’s tape.
- Prepare the Yeti cup: Clean and dry the surface of the Yeti cup, and then mask off any areas that you do not want to be painted, such as the handle or the bottom of the cup.
- Cut out the design: Cut out a piece of hydro dip film with your desired design. The film should be large enough to cover the entire surface of the Yeti cup.
- Activate the film: Follow the manufacturer’s instructions to activate the hydro dip film. This typically involves immersing the film in water for a few minutes until it becomes soft and pliable.
- Apply the film to the Yeti cup: Carefully place the activated film on the surface of the Yeti cup, smooth it out, and then allow it to dry for a few minutes.
- Spray paint the Yeti cup: Use spray paint to cover the hydro dip film and the surface of the Yeti cup. Make sure to follow the manufacturer’s instructions and apply the paint evenly.
- Remove the film: Once the paint has dried, carefully remove the hydro dip film from the surface of the Yeti cup.
It is important to use caution and follow the manufacturer’s instructions when hydro dipping a Yeti cup or any other object.
It is also a good idea to test a small, inconspicuous area before applying the paint to the entire surface.
FAQ’s of How to spray paint a yeti cup
Conclusion on How to spray paint a yeti cup
Here is the complete guide to spray painting your yeti cup. I hope you enjoyed the post and got the knowledge and method to paint the yeti cup.
If you have any questions or confusion in your mind related to this post then don’t hesitate to comment down here and I will give you an answer as soon as possible.
Till then take care of yourself. Happy painting!

Matthew Edward is a professional painter who loves to paint and wants to share useful tips and tricks which he had learned in many years of experience in painting. He also used many products that can be used for painting he has tried and tested each and every product to give an unbias opinion about it in his review. This blog is very useful for those newbies who want to learn painting without making mistakes.


