No one wants to have an ugly mirror frame in their house. This is why many of us tend to keep it in a closet.
But even closet space tends to run out, especially if you have kids who love to hang up their shirts.
In this guide, I will show you how to paint a mirror frame without spending too much time on it so that it looks prettier and well-maintained for future use!
I’m not sure what I was thinking when I saw this funky mirror at the thrift store. Even though it had a curtain rod hole cut in it.
I couldn’t believe there wasn’t something better to do with this aside from just letting it sit in my garage while it collected dust.
To be honest, I probably would have tossed it if one of you clever people on Pinterest hadn’t alerted me to its potential while creating some painted scrapbook paper artwork back in March.
How to spray paint a mirror?
Tools we need to spray paint mirror
If you are going to spray-paint a mirror frame/mirror, stay away from metal ones because the paint may chip.
First, tape off areas that should remain unpainted—like this little scallop section and also the inside loop on these double earrings.
Trim any excess tape from around the area so your painter’s tape won’t peel off accidentally later on. you might be thinking of painting shutters which is also confusing in doing.
But don’t worry I have also posted a solution for that too!

- Frog tape – Most painter’s tapes are too loose and don’t stick well, however, frog tape is better quality than blue painters’ tape. It costs a few cents more but it’s worth it.
- Spray paint your desired color
- Brown paper for covering glass
- Mirror or frame which you want to re-paint with spray paint or fix the paint
Step to paint mirror
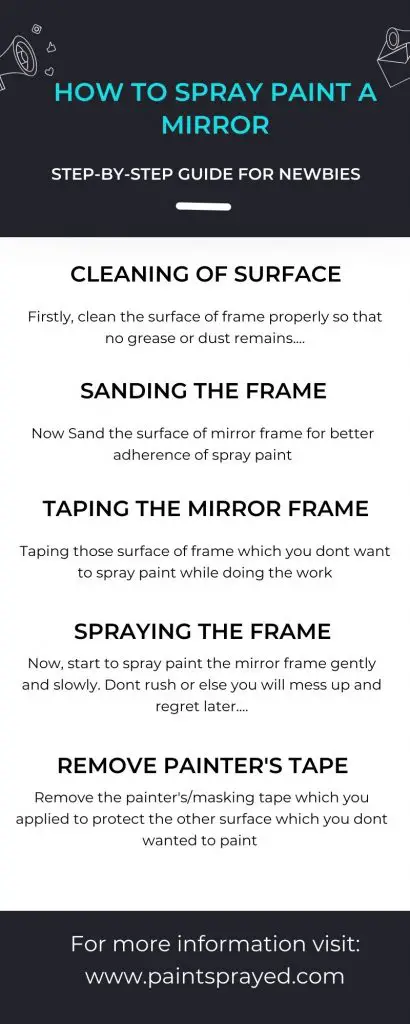
Cleaning the surface
It is important to clean the surface you are about to paint. It could be greasy, so make sure to use something degreasing like Krud Kutter.
Let your project dry completely before trying to paint over it.
Sand the frame
Sand the mirror frame before painting it. This will give the paint something to bite into, making a smooth finish much easier to achieve.
You’ll be happier with the results if you start from scratch and sand the surface, so aim for a surface that feels flat and even.
Detach the mirror from the frame if possible
Remove the mirror from the frame because it’s easy to damage them with paint if you don’t take a few precautions.
It is much easier for the paint to get into cracks and crevices where wood is joined together, so removing the glass from the wooden frame makes it easier to stop this from happening.
Look for screws on the back of the mirror, then unscrew them using a screwdriver. Afterward, lift or slide out the mirror, but remember that these things can crack easily!

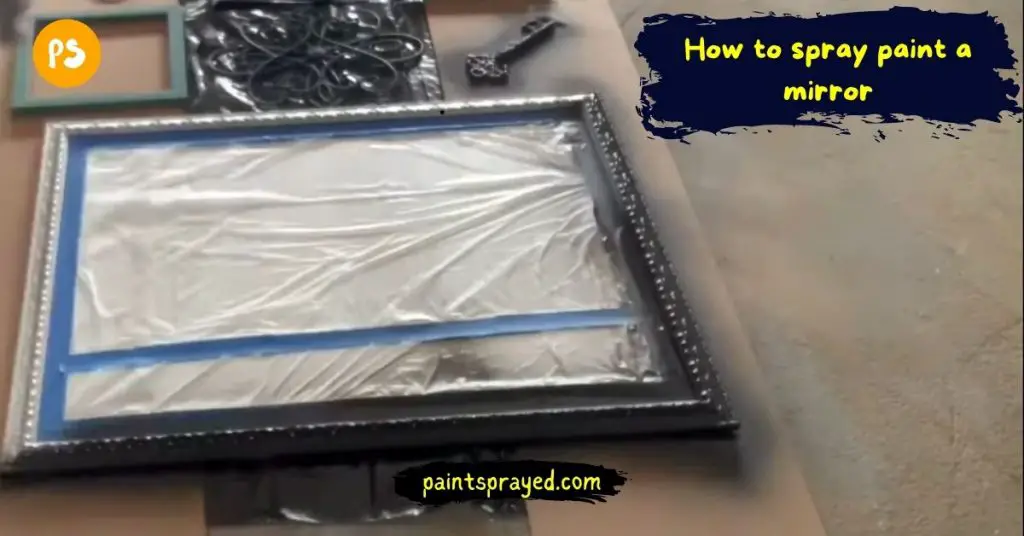
Tape the frame
Step two in the spray-painting process is to take some masking tape and cover up all the edges of the portions of your metal frame.
You’ll want to make sure you do this on each side and also around corners, especially if you’re working with a metal or other material that might be layered or have different textures.
This step is important because it will prevent your paint from seeping over into areas that you don’t want it to go, which could leave parts of your creation looking unfinished when you’re finished.
To do this, first, lay your mirror or frame flat on the ground.
Covering the surface with brown paper is best if you are painting over glass – because covered surfaces let paint get into the mirror.
Start spraying with a paint sprayer
Now it’s time to let your creativity shine! Be sure to shake the can of spray paint before you begin.
Begin by painting surfaces that usually face up in such a way that the paint lands on the bottom side.
Next, get down close and inspect all of the nooks and crannies, spraying all missing and neglected areas. Finally, proceed to spray “everything else.”
You can allow for at least 30 minutes for drying between coats if you’re particularly apprehensive about having paint marks on your fingers.
But I prefer waiting longer before applying a second coat because coats tend to stick better as they gradually build up over time!
A secret to getting a smooth finish with spray paint is not to hold the spray in one place for too long. This will create uneven patches and drips. Instead.
You should move quickly while still staying steady and see when you have enough paint on the surface of what you’re painting.
Remove tape
We recommend removing the tape as soon after spraying your work or project as possible.
Sometimes in order to do that you’ll need to be careful and gentle, especially if the tape is old and sort of stuck.
You don’t want to take off too much paint, but you could end up spray painting your mirror or a wall with over-spray, which can be easily fixed! If you’ve done that, don’t worry!
Tips for painting
- Preparation is most of the battle when it comes to painting, so make sure it’s clean
- Always make sure that your working surface is covered with something like paper, newspaper, or plastic bags. Make sure it’s close by and easy to clean afterward.
- I suggest holding the paint can no more than 10-12 inches above the object you are painting.
- Be dynamic! Holding your can in one spot while painting is not going to give you the best finish.
- Many thin coats will look better than one thick coat of paint. Allow the paint to dry in between coats.
What kind of paint do you use on mirrors?
Acrylic paint is a safe choice for painting mirrors, as it is easy to use and dries quickly.
However, it is important to note that the mirror’s surface will no longer be reflective after it is painted.
And the paint may also be more prone to chipping or peeling on a slick surface like a mirror.
A better option is to use spray paint specifically made for glass surfaces. It is important to clean the mirror thoroughly before painting and to apply the paint in thin, even layers.
Additionally, it is recommended to use a clear coat or sealer to protect the paint and ensure it adheres properly to the mirror surface.
How do you cover a mirror with spray paint?
Here is a general process for covering a mirror with spray paint:
- Clean the mirror thoroughly with a mixture of water and mild detergent to remove any dirt, dust, or fingerprints. Rinse the mirror with clean water and dry it completely.
- Tape off any areas of the mirror that you do not want to paint, such as the edges or the frame.
- Place the mirror on a flat, protected surface, like a drop cloth or a piece of cardboard, and make sure it is level.
- Shake the spray paint can well before using it.
- Hold the spray paint can about 8 to 10 inches away from the mirror and spray in a sweeping motion, using even light coats. Avoid spraying too much paint at once, as this can cause drips and runs.
- Allow the paint to dry completely before applying a second coat. Repeat the process until the desired coverage is achieved.
- Once the final coat is dry, apply a clear coat or sealer to protect the paint and ensure it adheres properly to the mirror surface.
- Once the clear coat is dry, carefully remove the tape from the edges and frame.
It’s important to use spray paint specifically made for glass surfaces and also to follow the manufacturer’s instructions and safety precautions when using the spray paint.
Additionally, it’s a good idea to work in a well-ventilated area and wear a mask to protect yourself from inhaling the fumes.
What’s the best way to paint a mirror?
The best way to paint a mirror is to first clean the surface thoroughly with a glass cleaner and let it dry completely.
Next, apply a coat of primer specifically designed for glass or metal surfaces. Once the primer is dry, apply the paint using a small foam roller or brush.
Be sure to apply thin, even layers, and allow each coat to dry completely before applying the next one. Finally, seal the
FAQ’s of How to spray paint a mirror
Conclusion on How to spray paint a mirror
Here is the complete guide to spray painting a mirror, step by step guide to painting a mirror which most newcomers find difficult in their career.
Don’t worry this guide will help you to paint without creating any mess and breakage of glass.
If you find anything confusing in your mind just drop a comment down here and I will reply as soon as possible with a satisfying answer.

Matthew Edward is a professional painter who loves to paint and wants to share useful tips and tricks which he had learned in many years of experience in painting. He also used many products that can be used for painting he has tried and tested each and every product to give an unbias opinion about it in his review. This blog is very useful for those newbies who want to learn painting without making mistakes.


